How to Connect to Gmail in Wisible with Two-Step Verification

For those who are using email with Google, both Gmail and G-Suite, you can connect Wisible with Google Mail, by follow these simple steps:
- Turn on IMAP
- Turn on 2-Step Verification*
- Turn on App Passwords
- Sync email with Wisible
In case of using G-suite, contact G-suite Administrator to turn on 2-Steps Verification and Less Secure Apps (To allow the usage of IMAP) before usage.
1. Turn on IMAP
Because Wisible use IMAP email connect, therefore, users have to turn on IMAP before the actual usage, by following these steps:
- Enter Gmail
- At top rght corner, clecik the ‘Setting’ button, there will be a pop-up window, click Setting
- Click on ‘Tab Forwarding and POP/IMAP
- Choose IMAP access, choose Enable IMAP (If it is enable already, you can skip this step)
- Click ‘Save Changes’
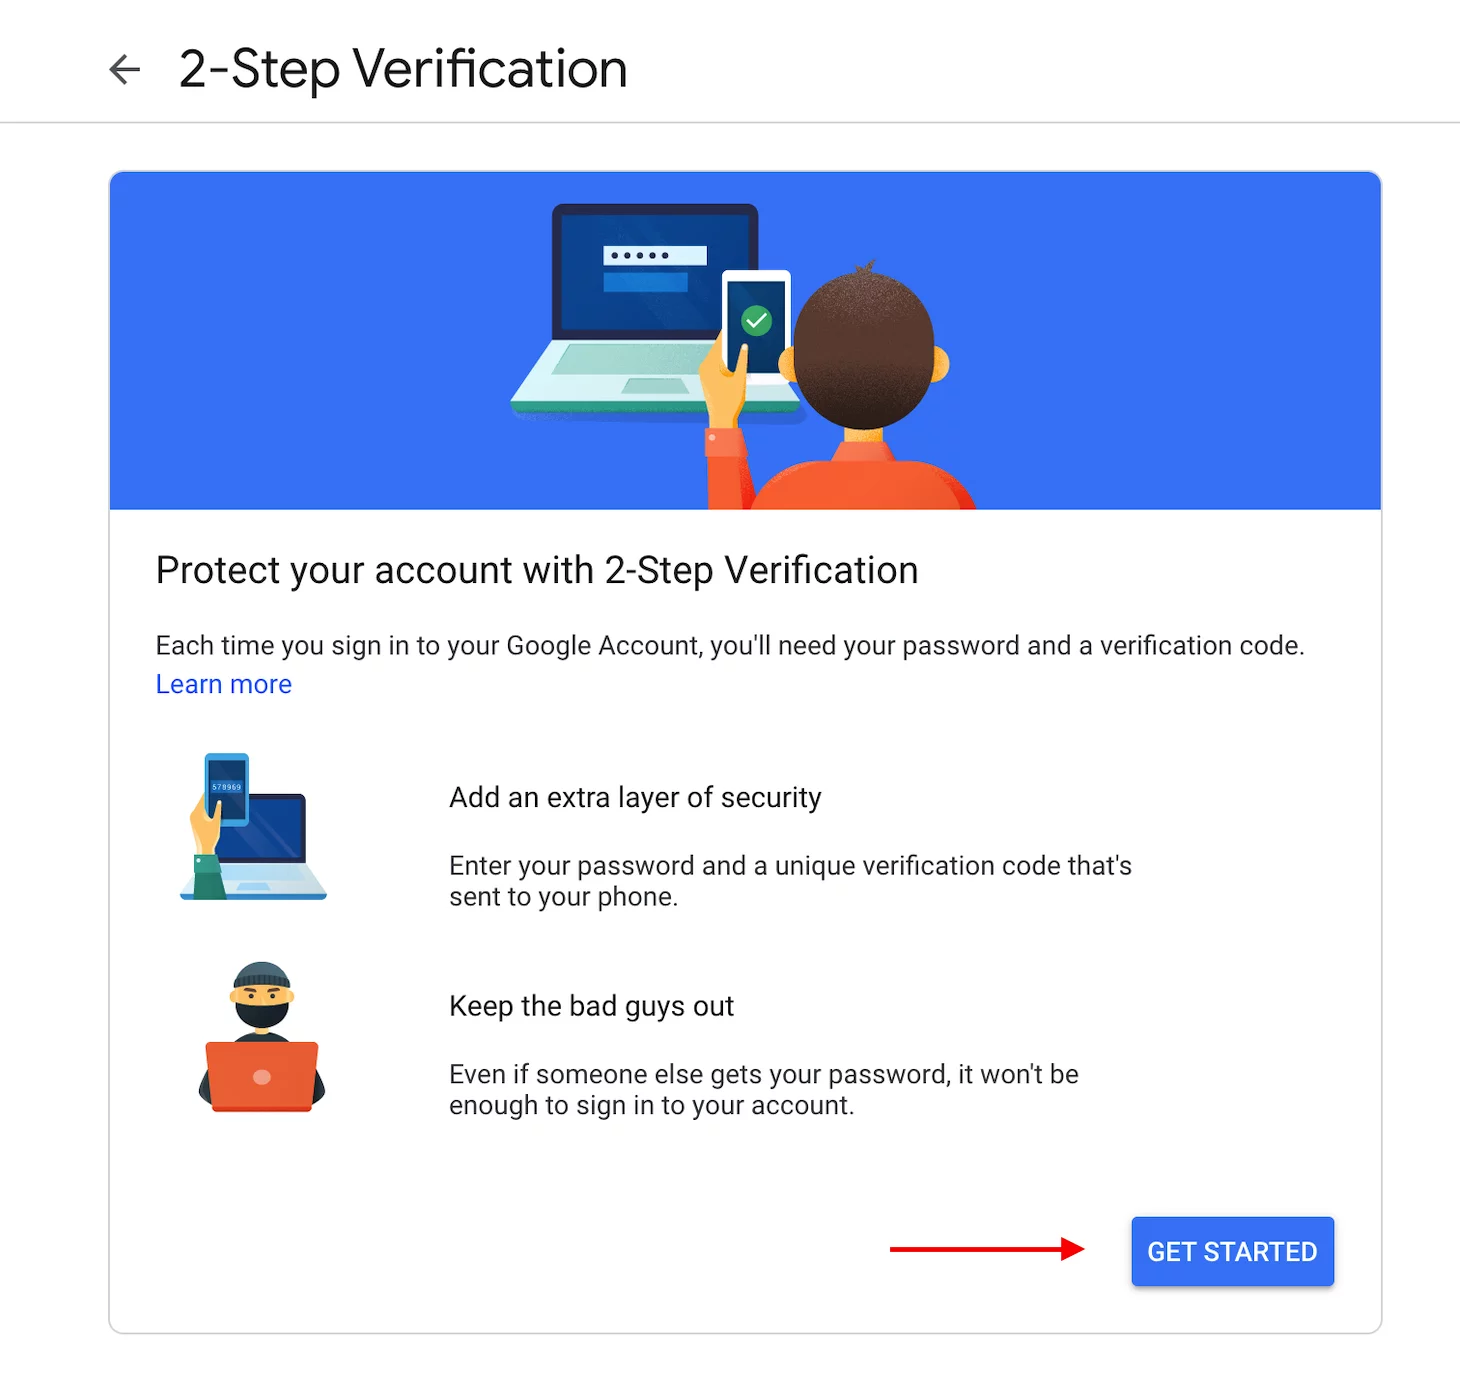
2.Turn on 2-Step Verification
In order to increase safety and security level and protect from any surveillance that might try to use your email, you can turn on 2-step verification by following these steps;
- Enter Google 2-Step Verification
- Click on ‘Get Started’ button to go to the next step
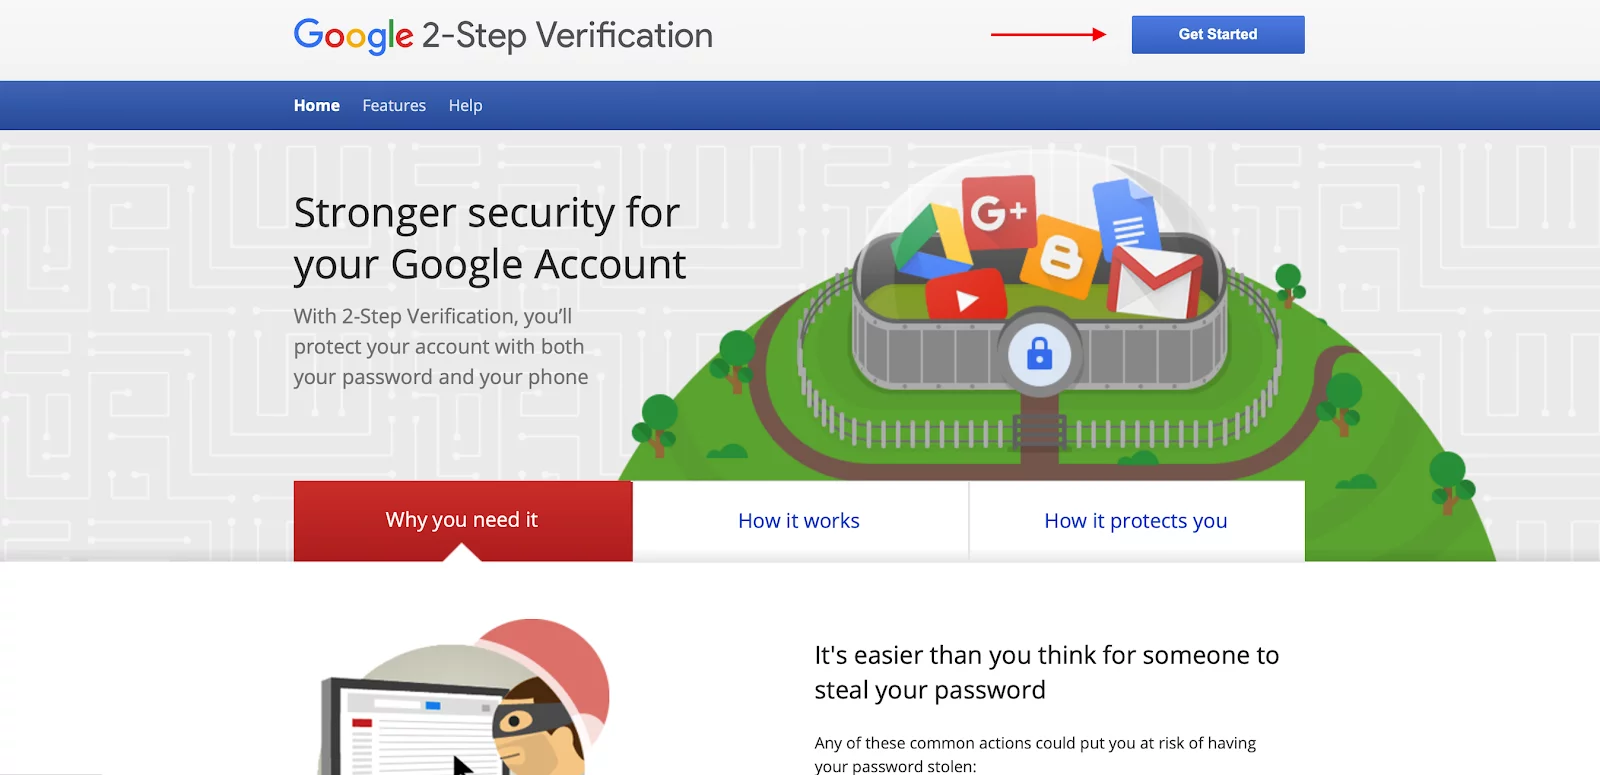
- Click on ‘Get Started’ button
- Sign in to Gmail account to turn on the verification, enter your phone number to receive the code, choose receive via ‘text message’ and then, click ‘Next’
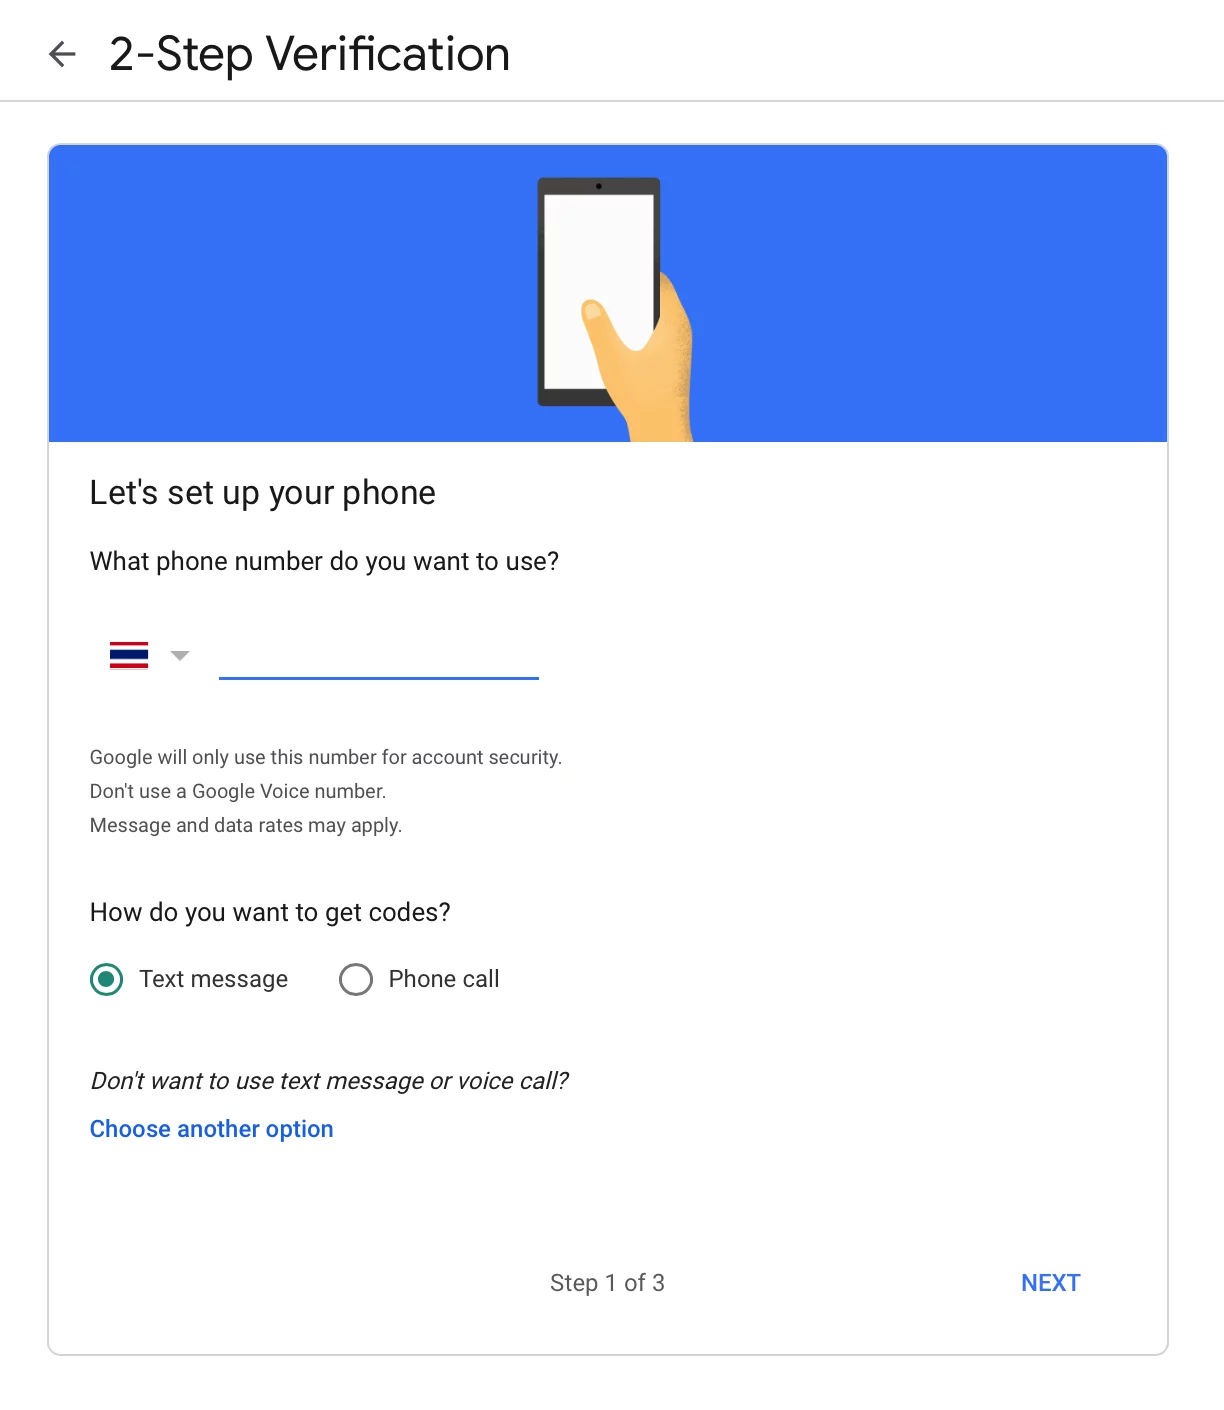
- This step, the system will send you the code into your mobile phone, fill in the code into this page and click ‘Next’
- Finally, click ‘Turn On’ button to start using the verification.
3. App Password
To use App Passwords, it is a step that a password will be created especially for the certain application that is connecting with your Google account. It is a one-time password to be used with an application that you have determined. In this case, it is connecting your Gmail with Wisible so that you can send and receive email through the system. This process is really safe because the created password cannot be used to access Google accounts through other channels. The steps are simple as:
- Sign In to Gmail
- Click on 9 dots menu, click on ‘Account’ or ‘Gmail Account’
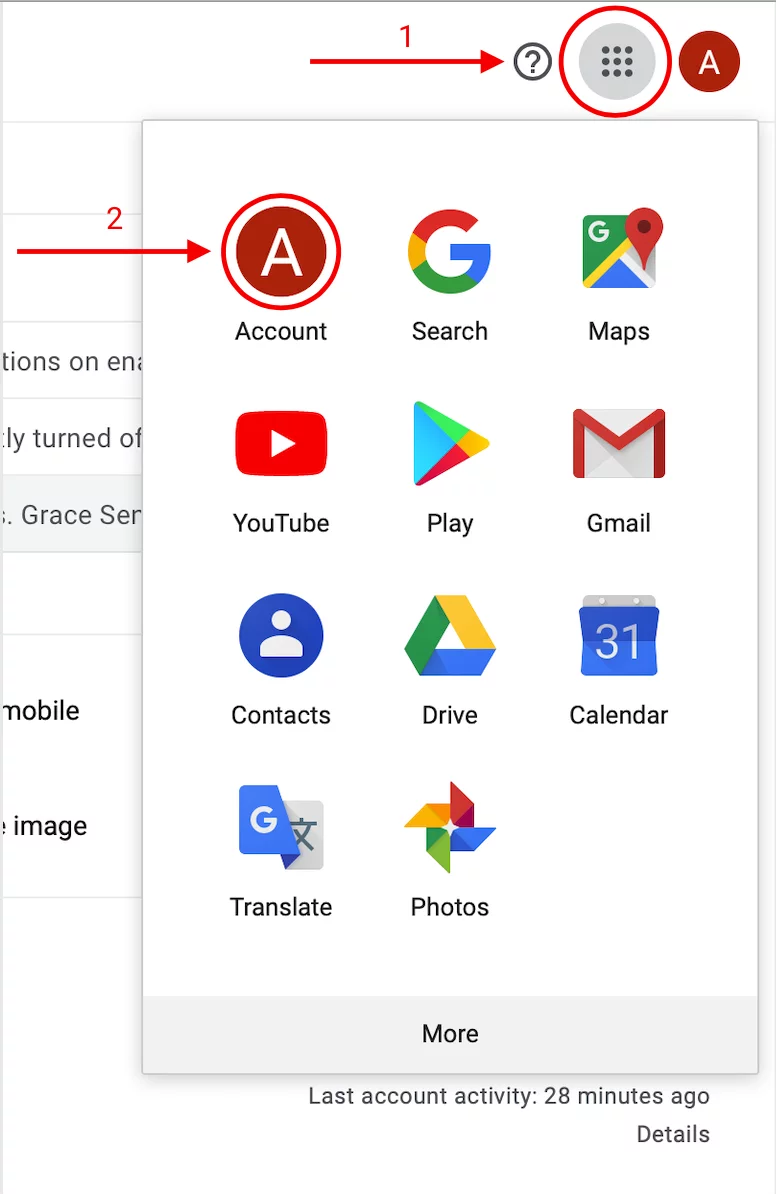
- Then, click on Security menu on the left hand side and click on ‘App Passwords’
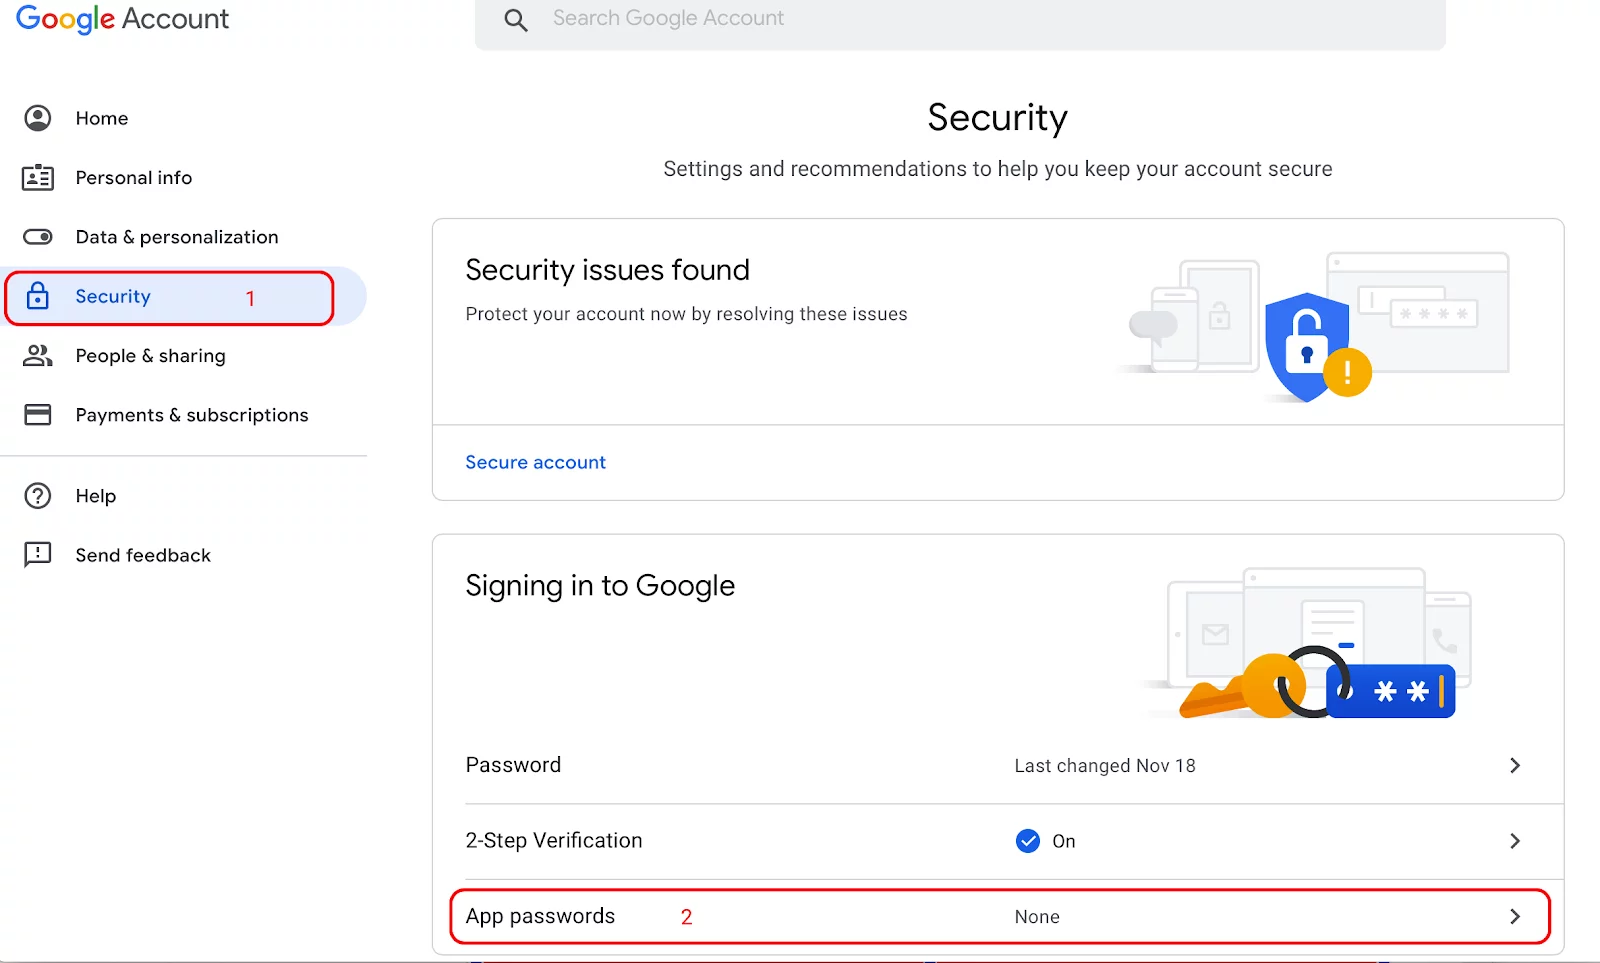
- Then, the system will let you sign in and will send you a verification code through your mobile phone that you have connected to the 2-step verification. Once, it is done, the system will bring you to the App passwords page
- Click ‘Select App’ and choose ‘Other (Custom name)’ ’
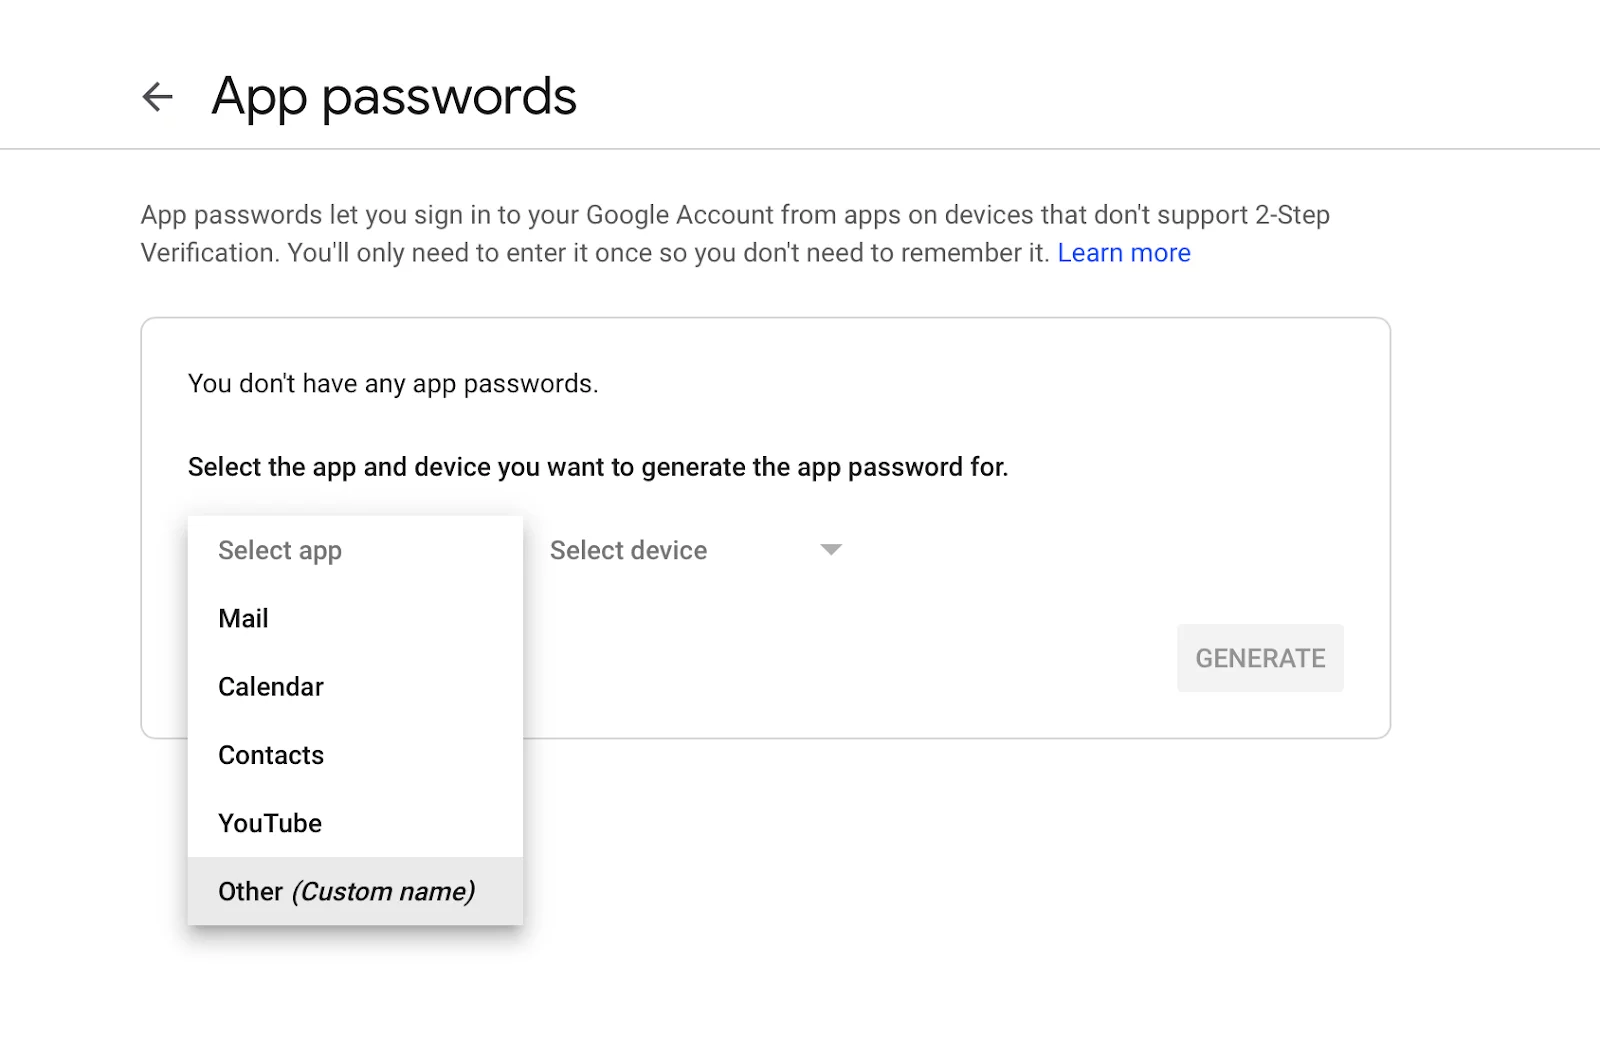
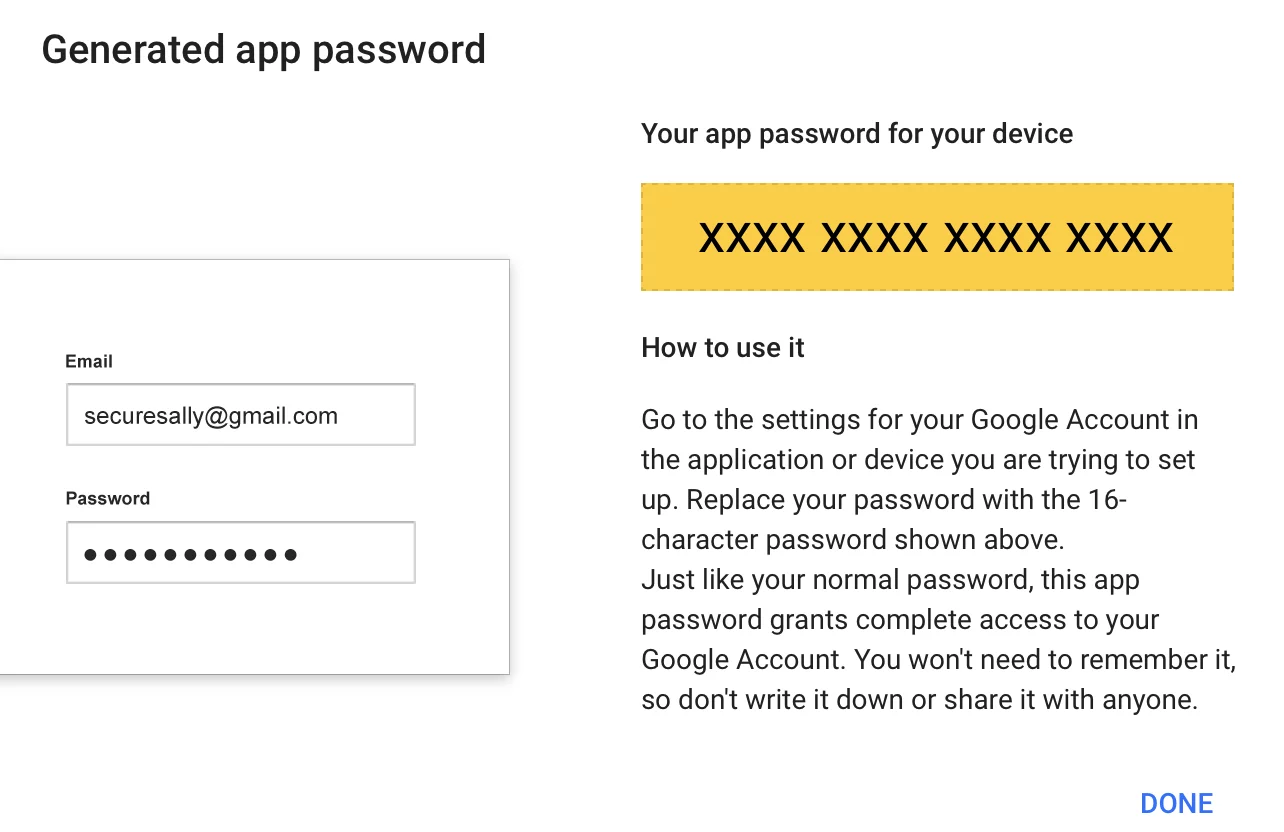
- Then, type ‘Wisible’ and click ‘GENERATE’ button. The system will create a special password for you. Copy that password so that you can fill that in Wisible when syncing the email in the next step.
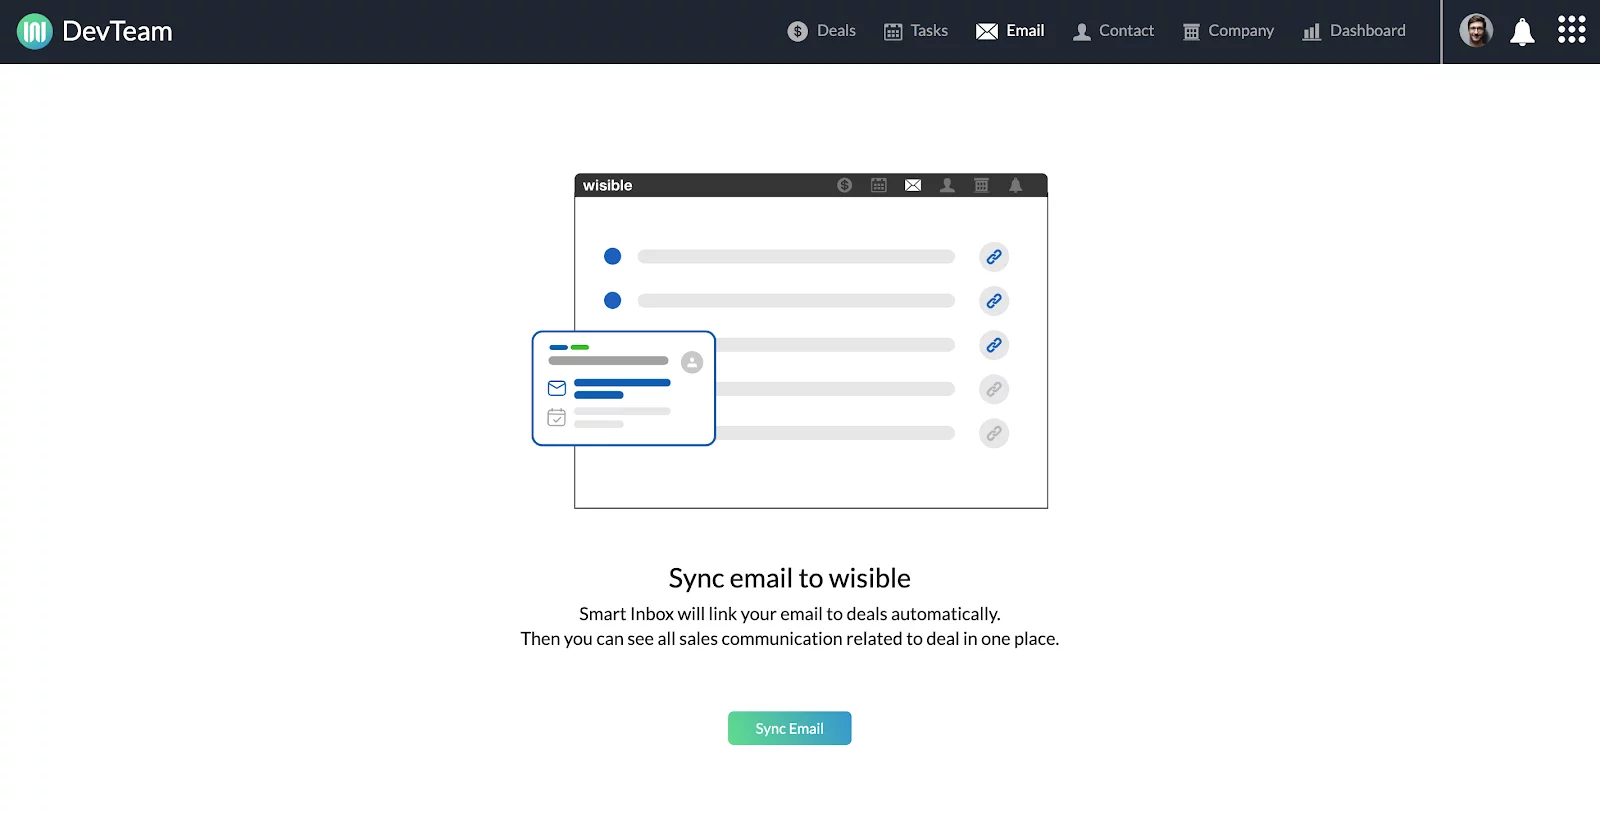
4. Syncing email with Wisible
- The last step is to connect email with Wisible for start using and following your deals with more efficient. You can send and receive email within Wisible by just syncing your email through these simple steps:
- Login to Wisbile
- Click on ‘Email’ at the menu bar
- Click on the ‘Sync Email’ button and fill in your email and password that you have received from the 3rd step. You will be able to use your email within Wisible.