Sign up to create your company in Wisible


Welcome all new users and thank you for interesting in Wisible
Firstly, for those who would like to start using Wisible, simply follows the process below
1. Go to the WISIBLE website
Go to our website, wisible.com and then, press on the ‘Sign Up’ button with Google (or LINE or email)

Tips: Choose only 1 representative to register, once the company registration process is completed, the first user will become an Admin. The admin will, then, be able to invite colleagues or teams to join in as members under the same company.
2. Enter Registration Page to Create Your Account and Your Company Account in Wisible
You can choose to register through any of these 3 methods as:
2.1Register with email which is not a Gmail account
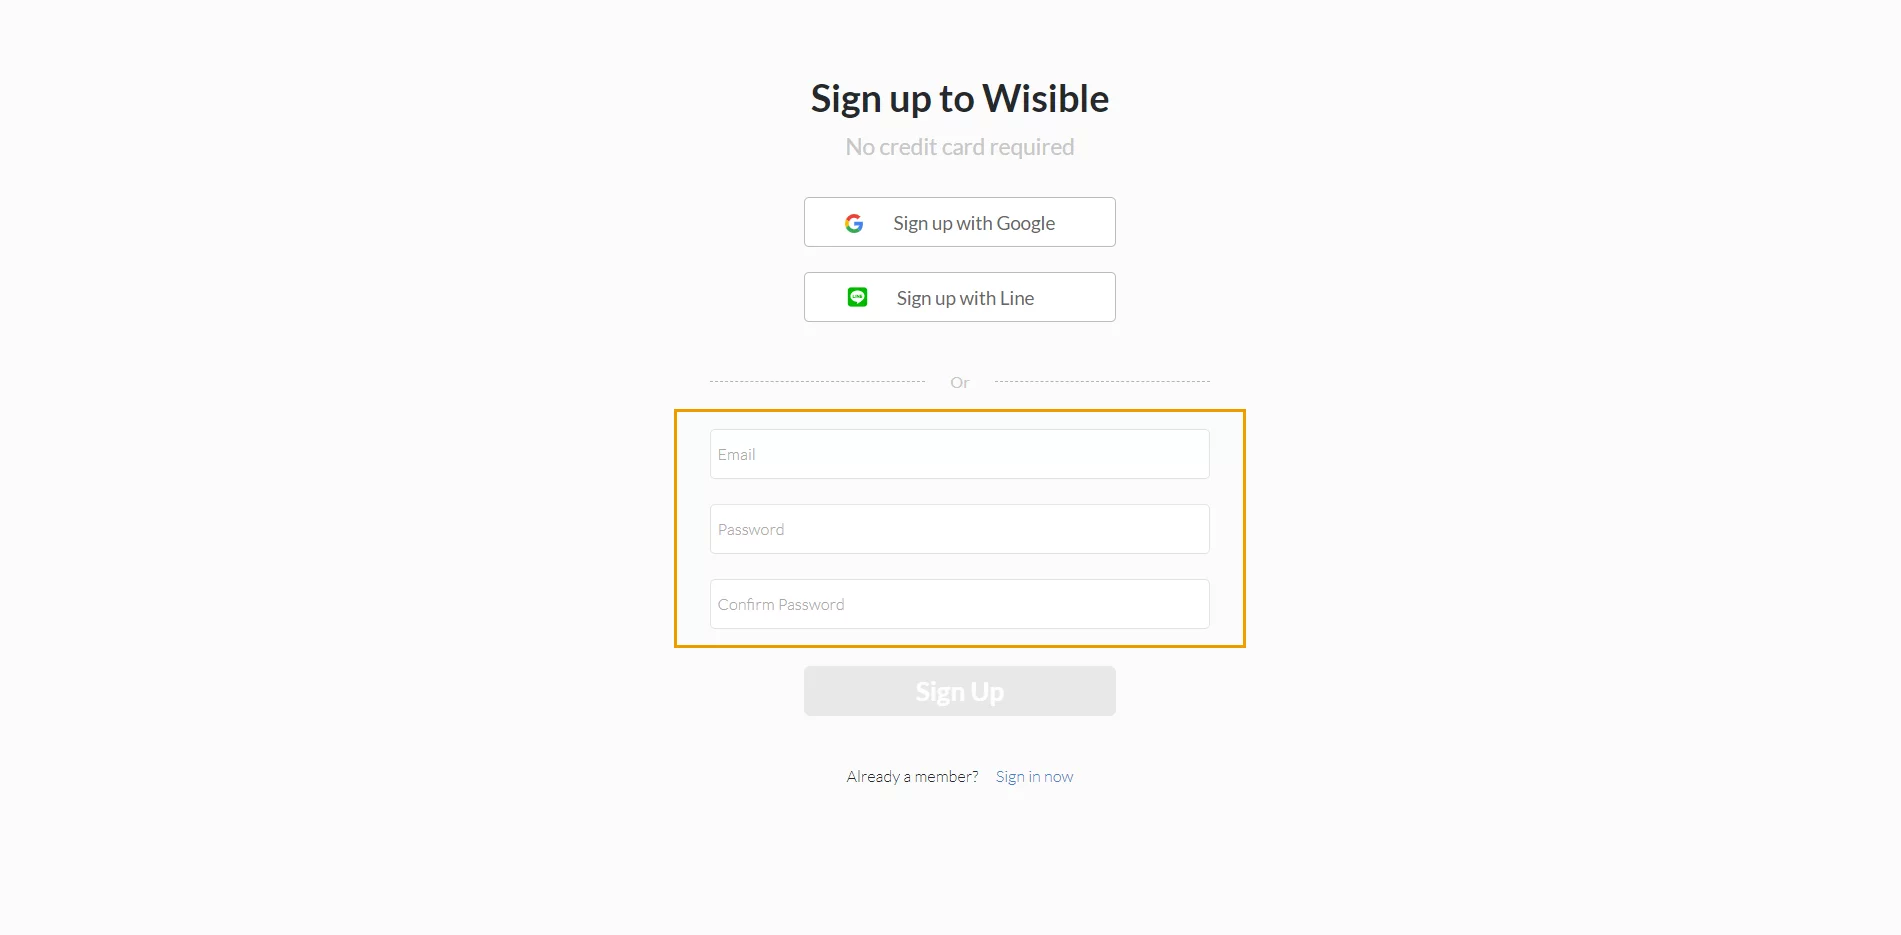
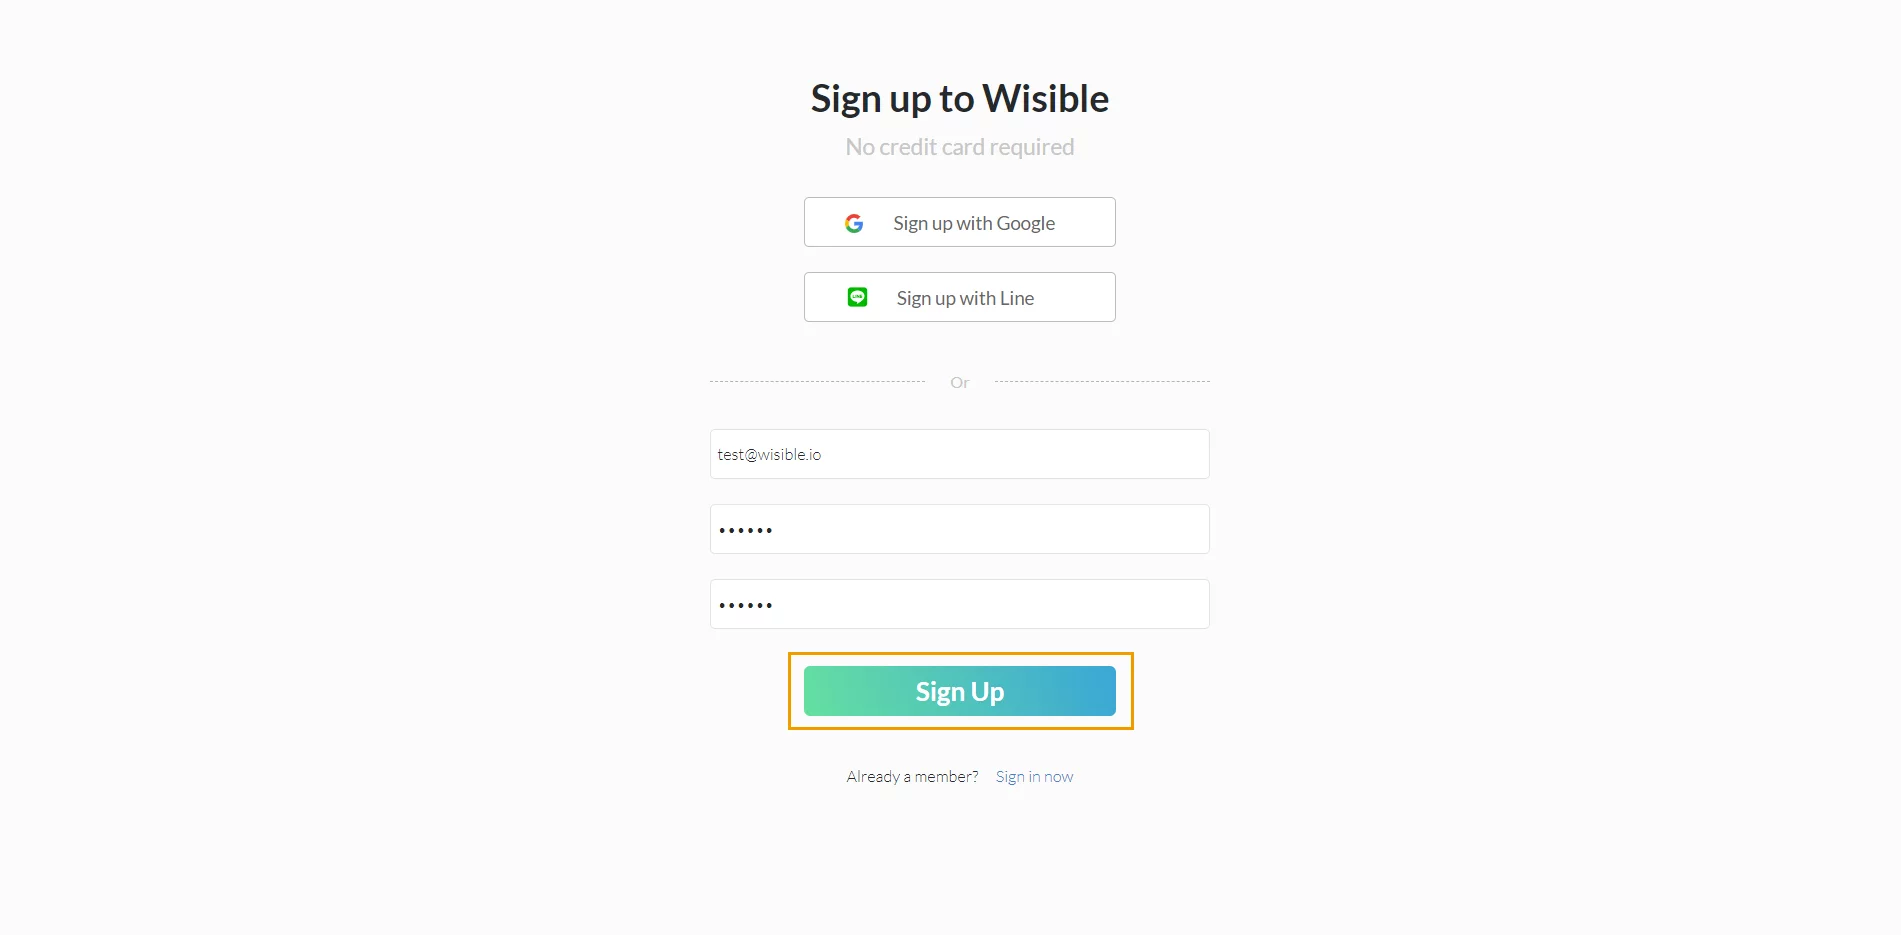
- Fill in your email in the email space, create your password for registering with Wisible in the password space and confirm your password again in Confirm Password space
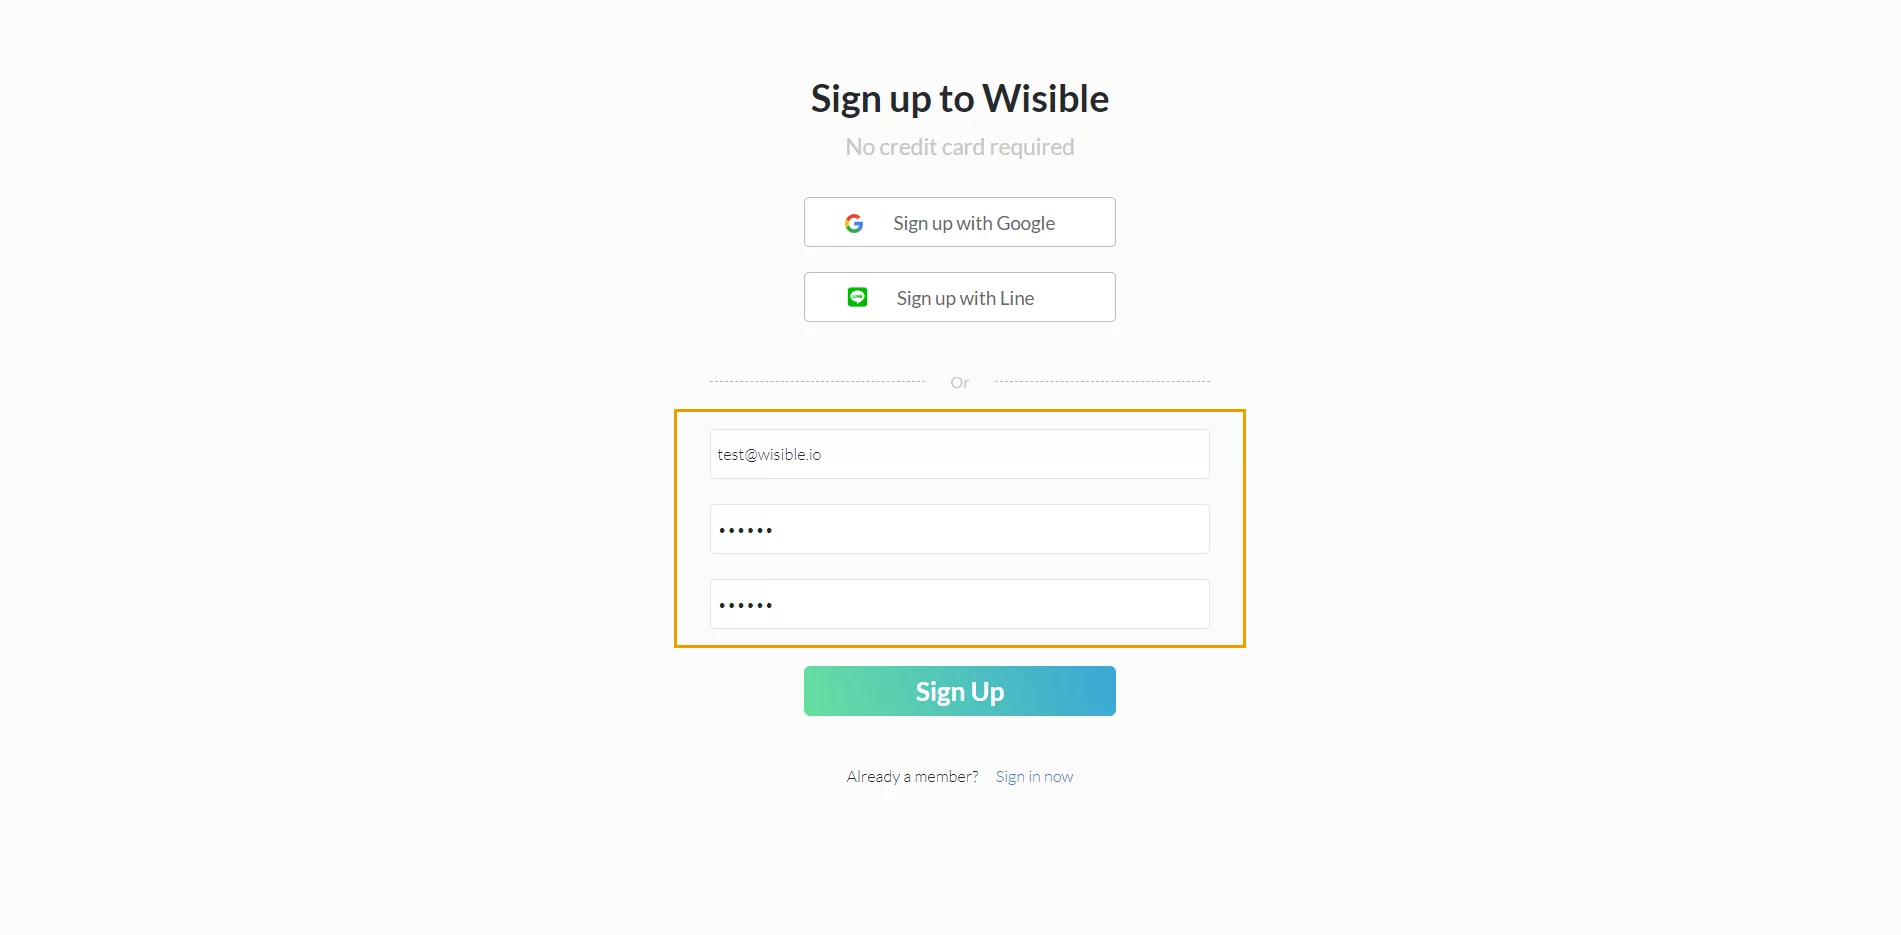
- After filling in the details, press ‘Sign Up’ button below
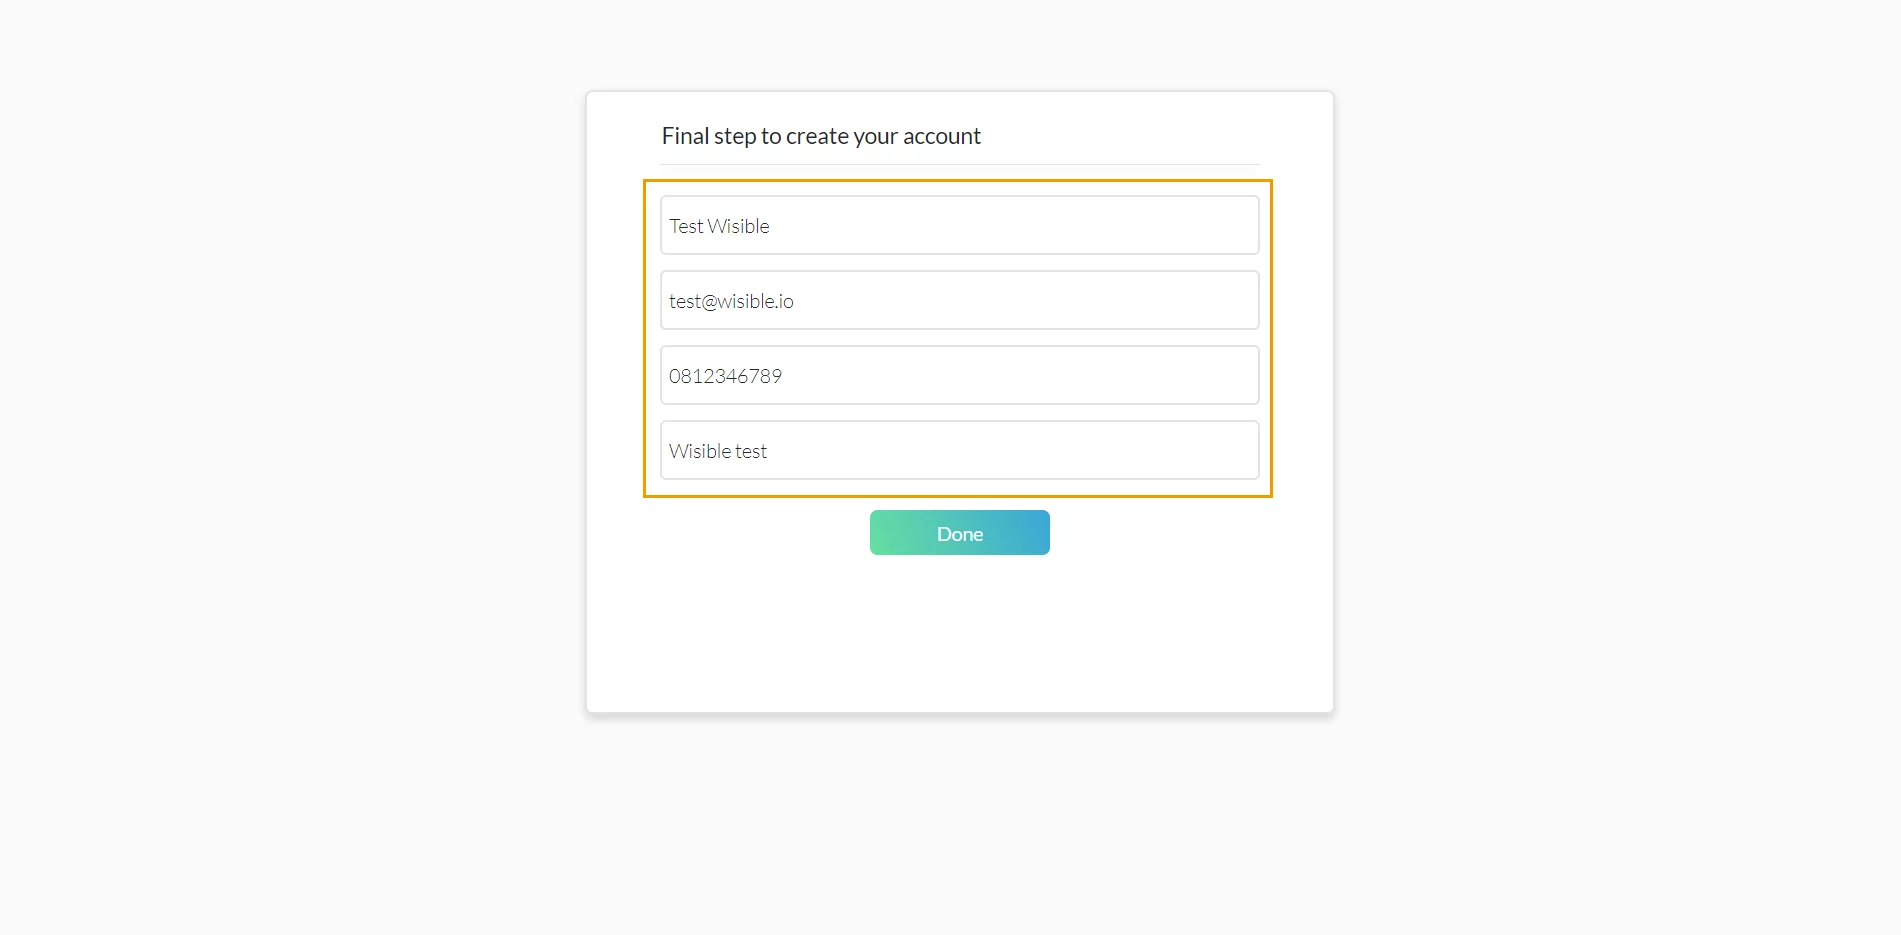
- After pressing the Sign up button, it will send you to fill more details, fill in your username in the first space which is Name
- Next, fill in your email that you had just registered earlier into the second space.
- Fill in your phone number into the Phone Number space.
- An important step is to fill in your company name into ‘Company Name’ space to create your company profile on Wisible and you can invite your colleagues to join later once the process is done.
Tips: It is not necessary to fill in the name or the formal name entirely. If the company name is quite long, then a shorter version or the abbreviation of your company that the members mutually understand is recommended.
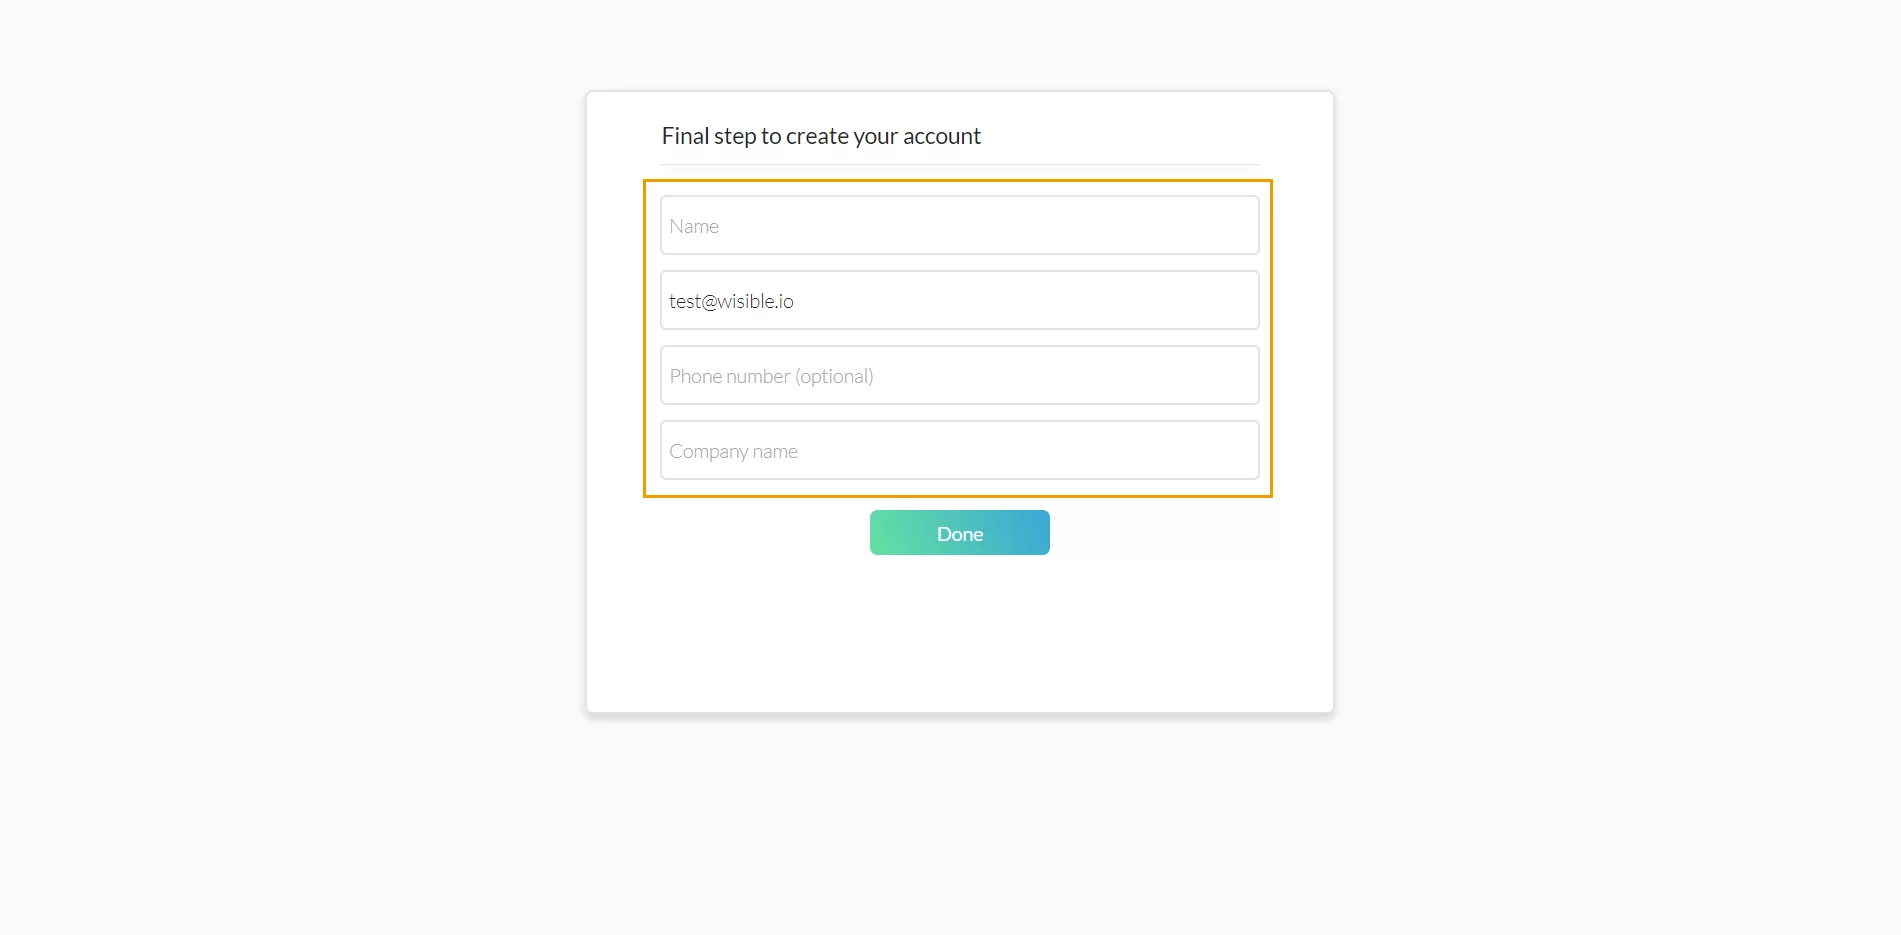
- After filling in the details, please recheck again, once confirmed, then press the ‘Done’ button to start using Wisible immediately.

2.2 Register with Gmail Account
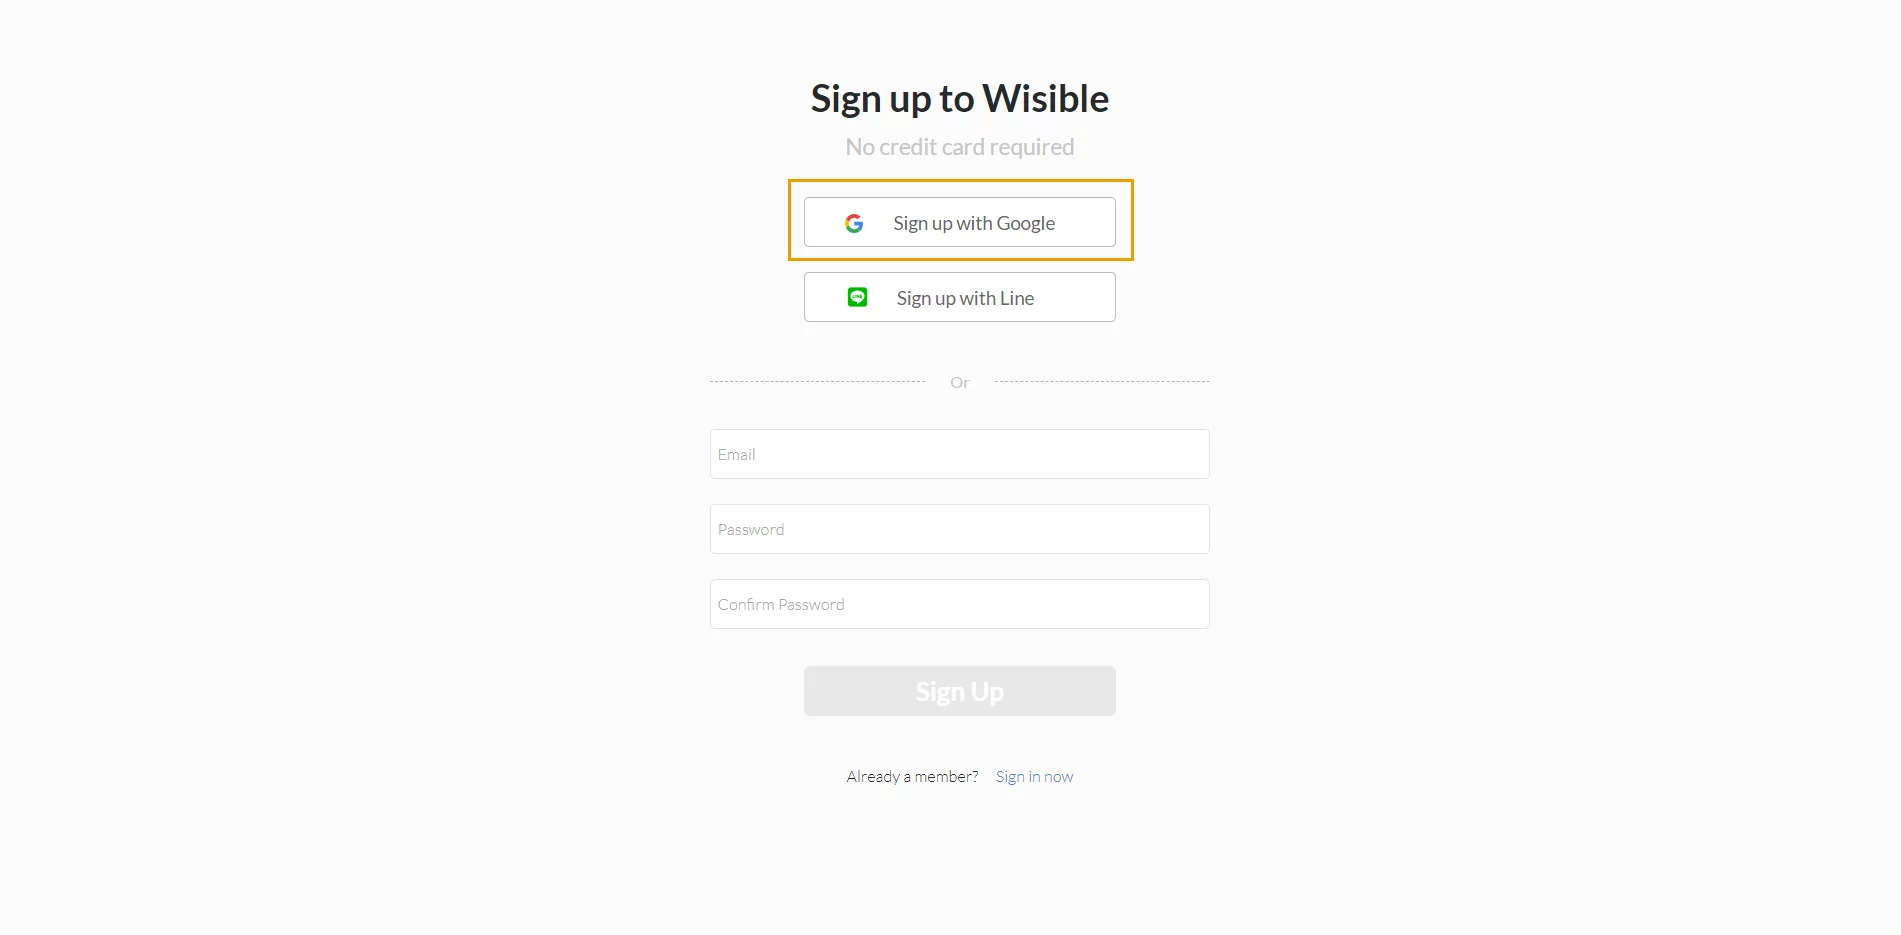
- Click ‘Sign up with Google’ for signing up with a Gmail or Google account.
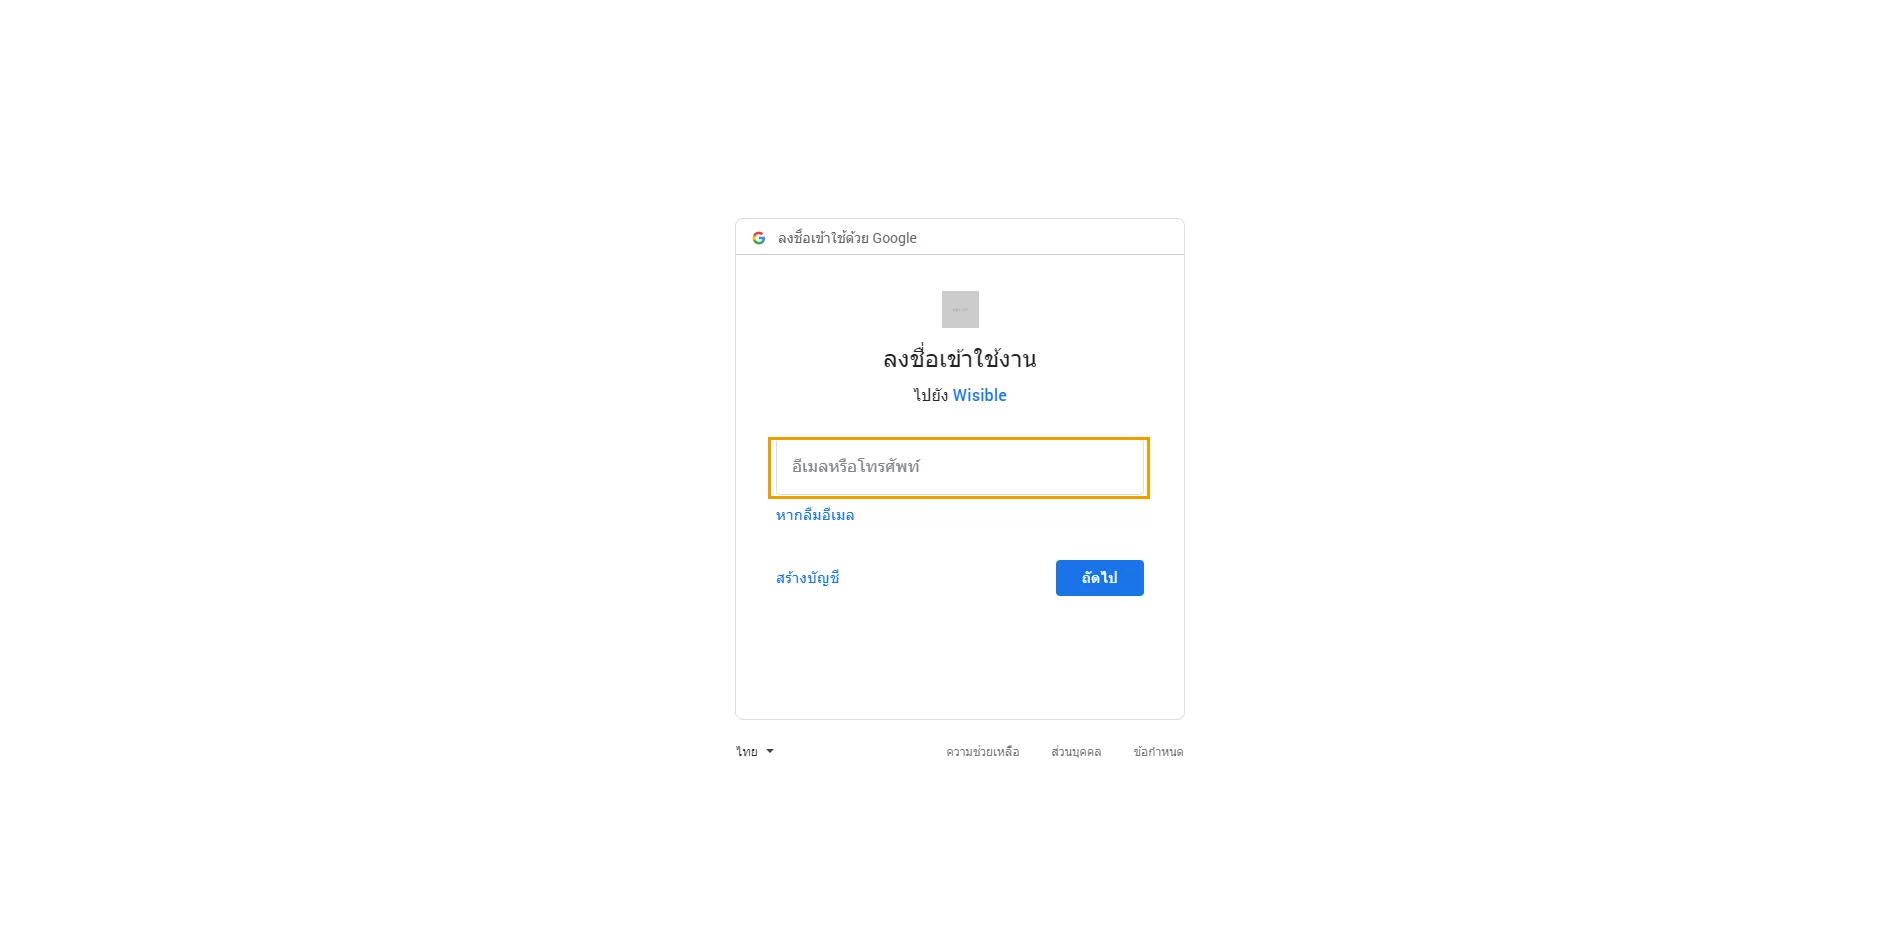
- It will link you to a sign in page of Google, fill in your Gmail account.

- After filling in the email, press ‘next’.
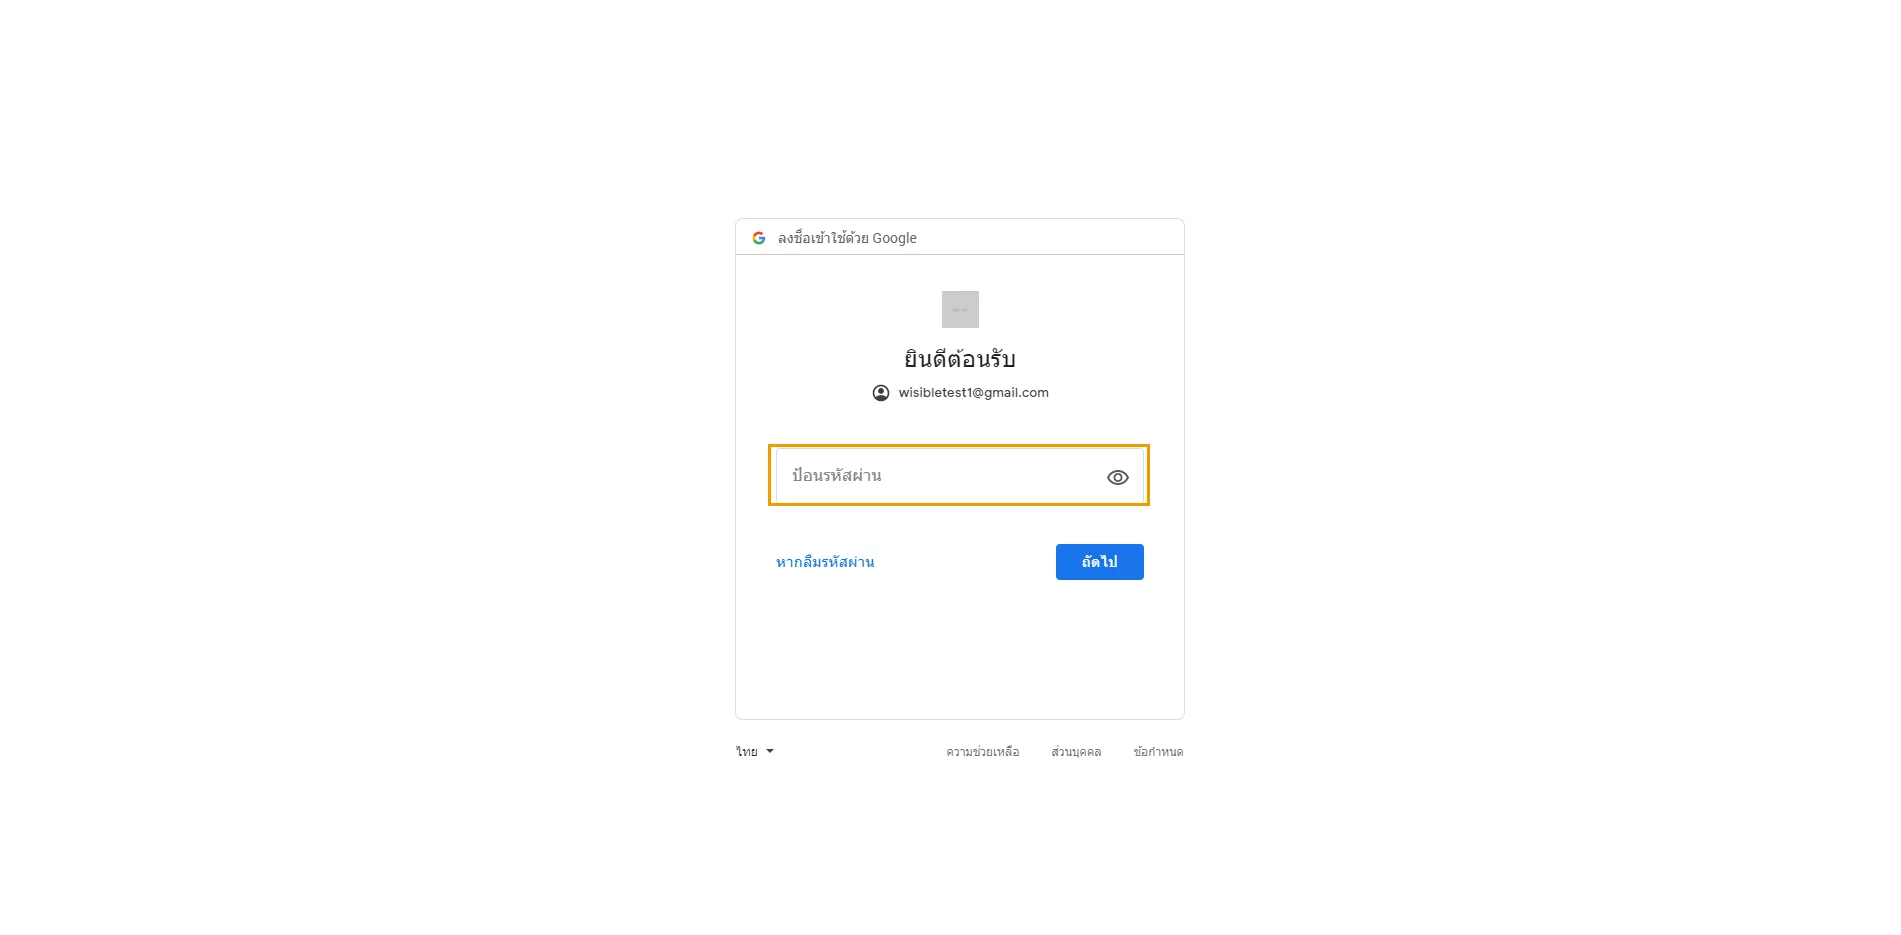
- Fill in the password of your Gmail.
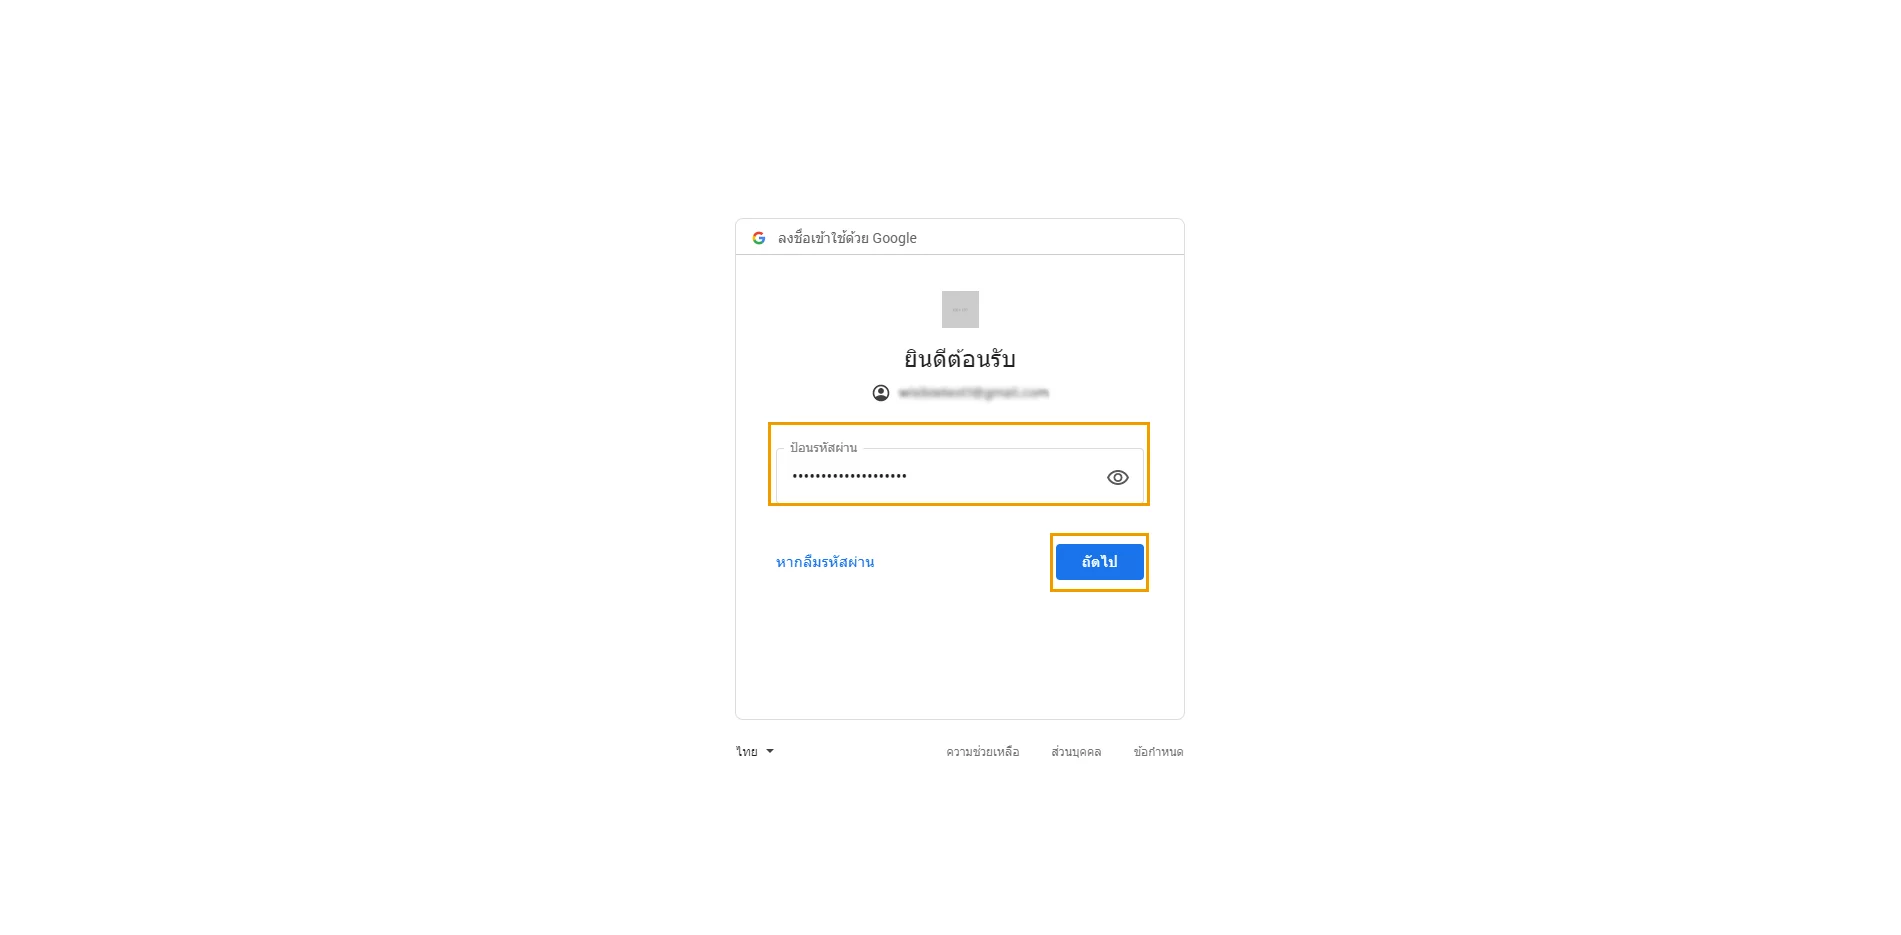
- Once finished, press ‘Next’ to enter to the next page for entering more information.

- First, fill in the name
- Then, the second step is email, use the email that you just use for registration.
- Fill in your phone number in the Phone Number space.
- An important step is to fill in your company name into ‘Company Name’ space to create your company profile on Wisible and you can invite your colleagues to join later once the process is done.
Tips: It is not necessary to fill in the name or the formal name entirely. If the company name is quite long, then a shorter version or the abbreviation of your company that the members mutually understand is recommended.
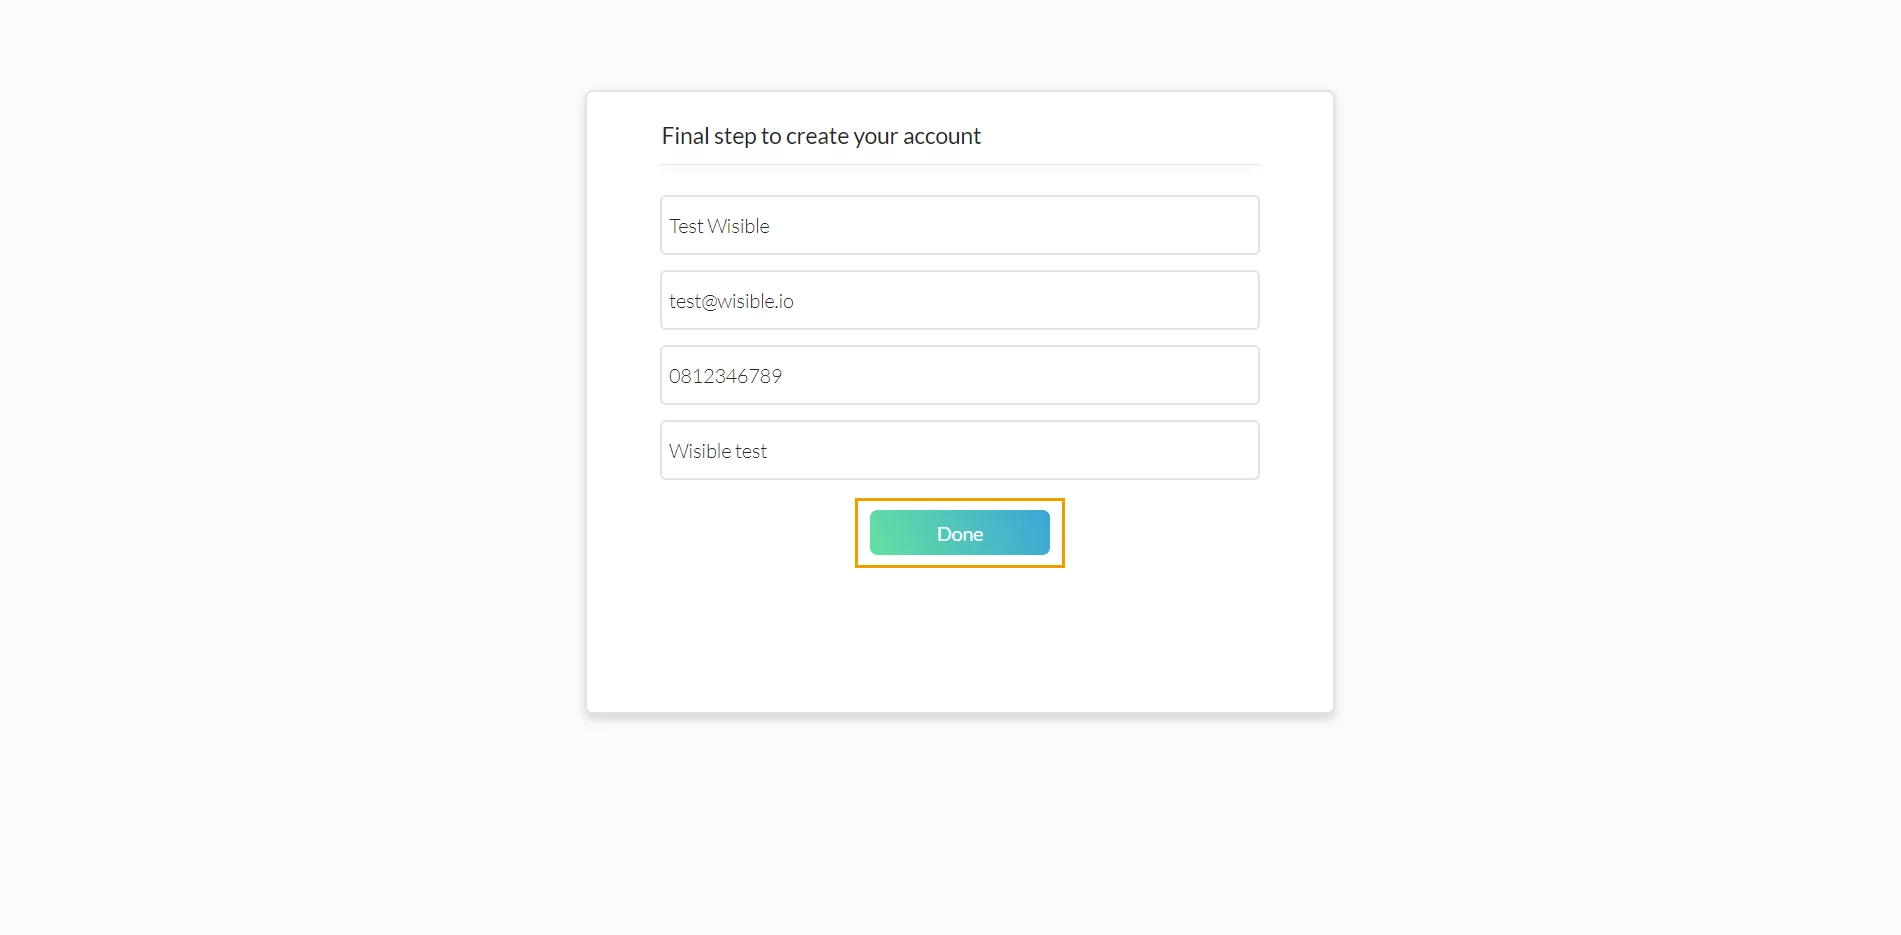
- After filling in the details, please recheck again, once confirmed, then press the ‘Done’ button to start using Wisible immediately.
2.3 Register with Line
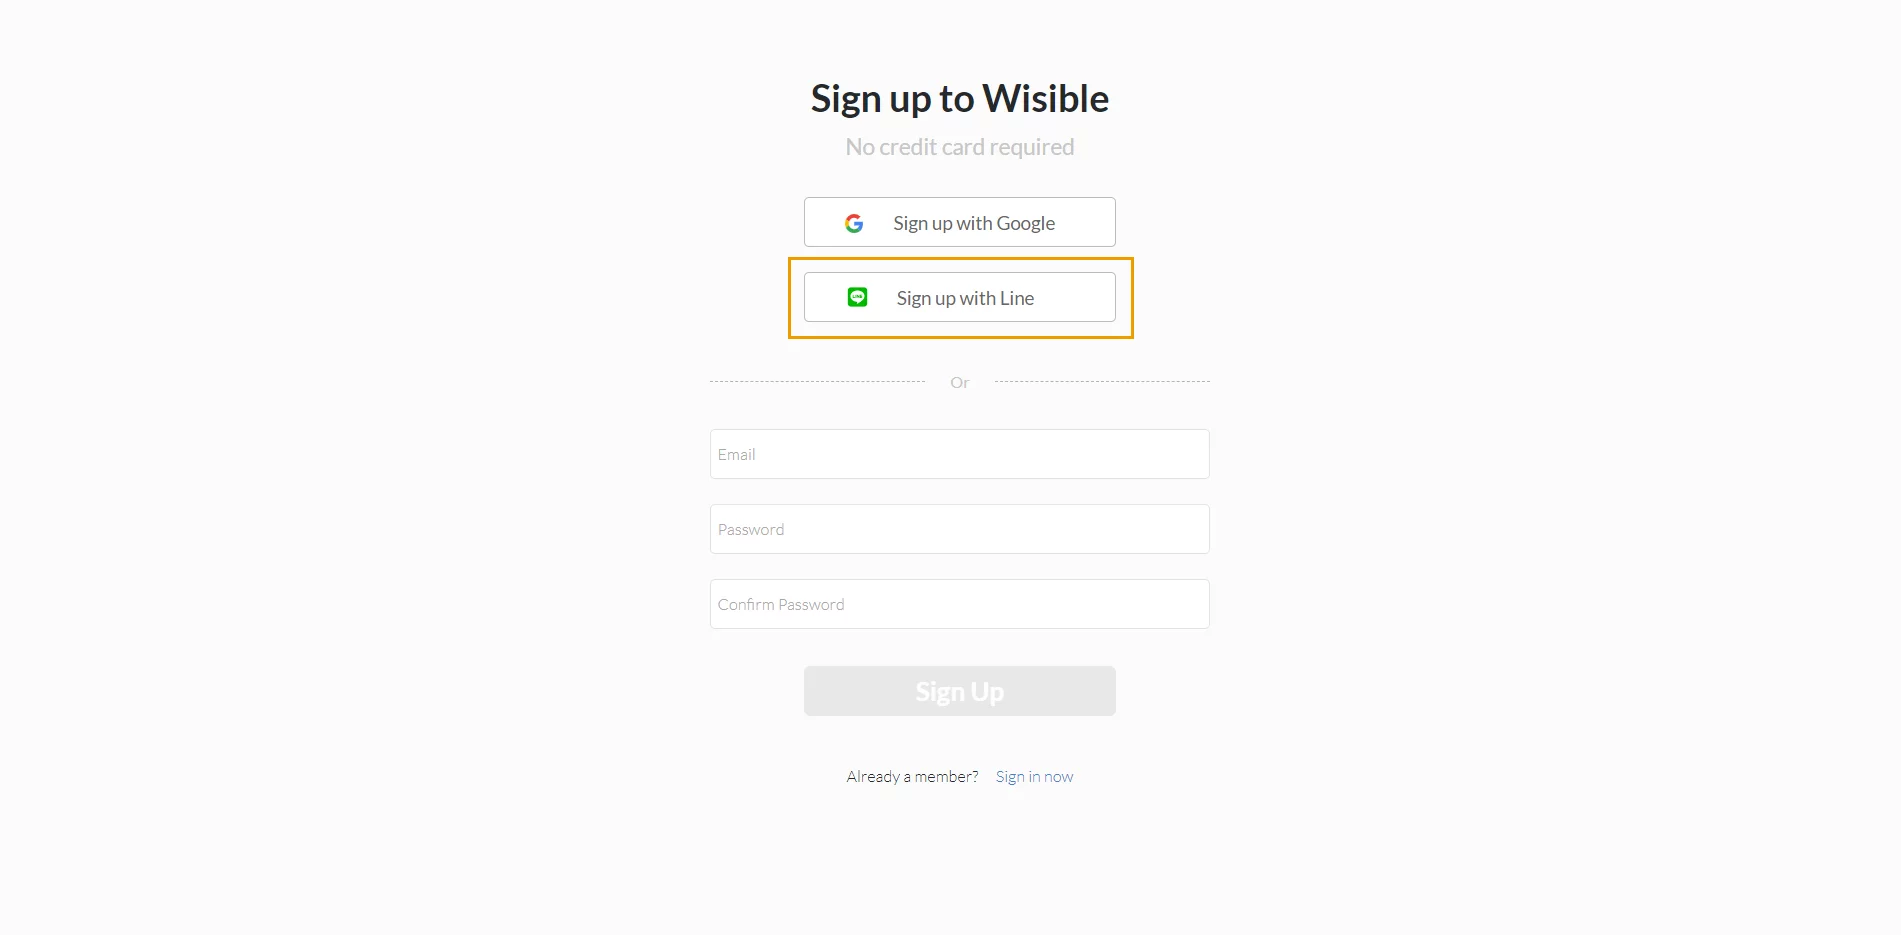
- Click ‘Sign up with Line’ to register with Line account
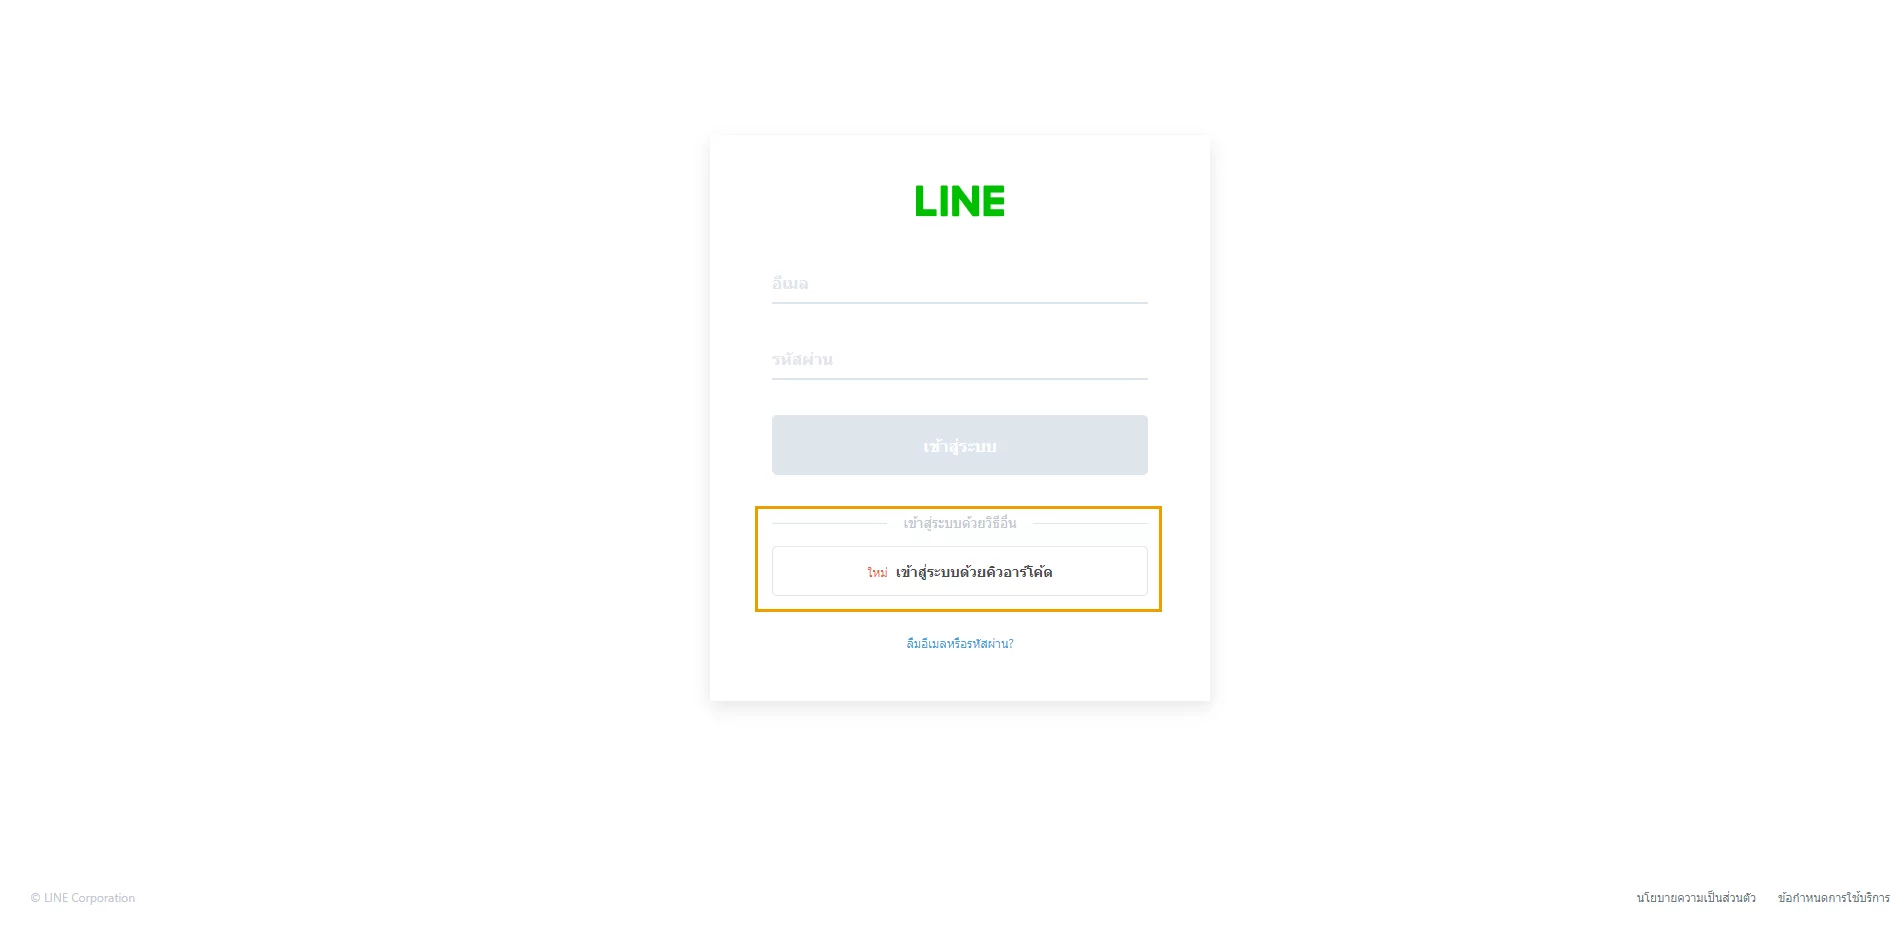
- Enter to sign up page through Line, sign up with QR Code is recommended.

- Scan QR Code with Line Application through the account that you would like to use.
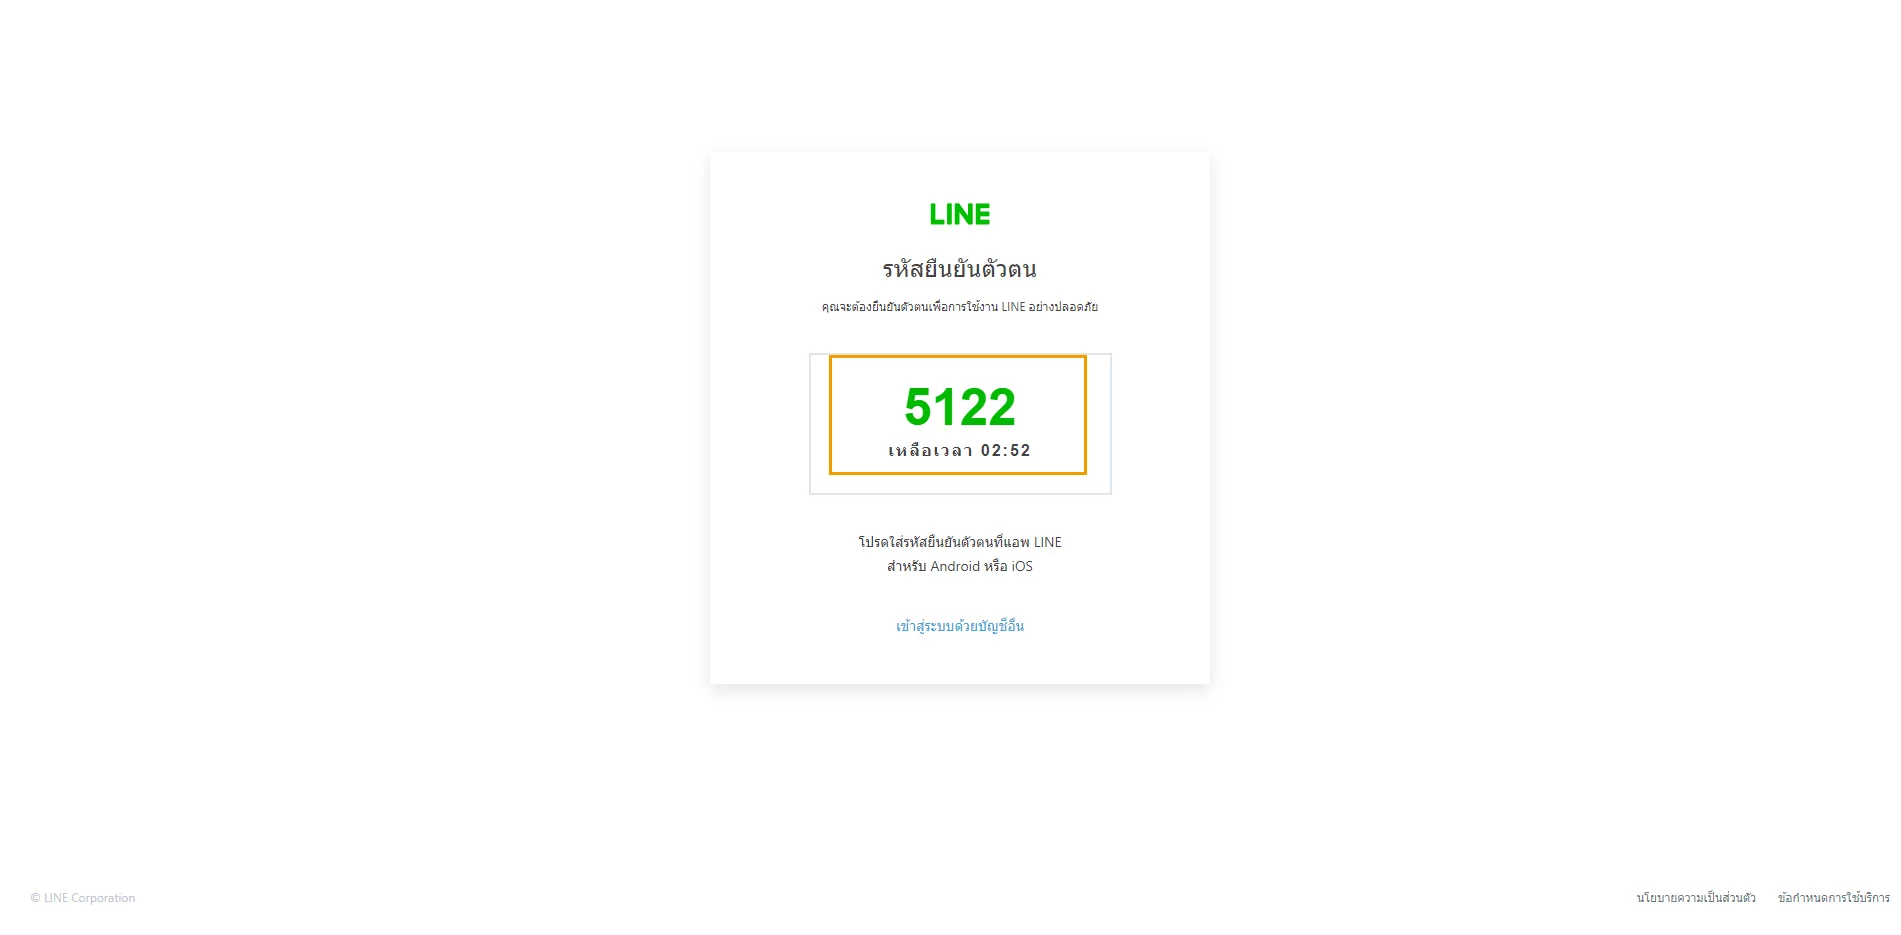
- After scanning the QR code, the smartphone will show identity verification page to sill in, fill up the 4 digits pin on your computer screen to verify.
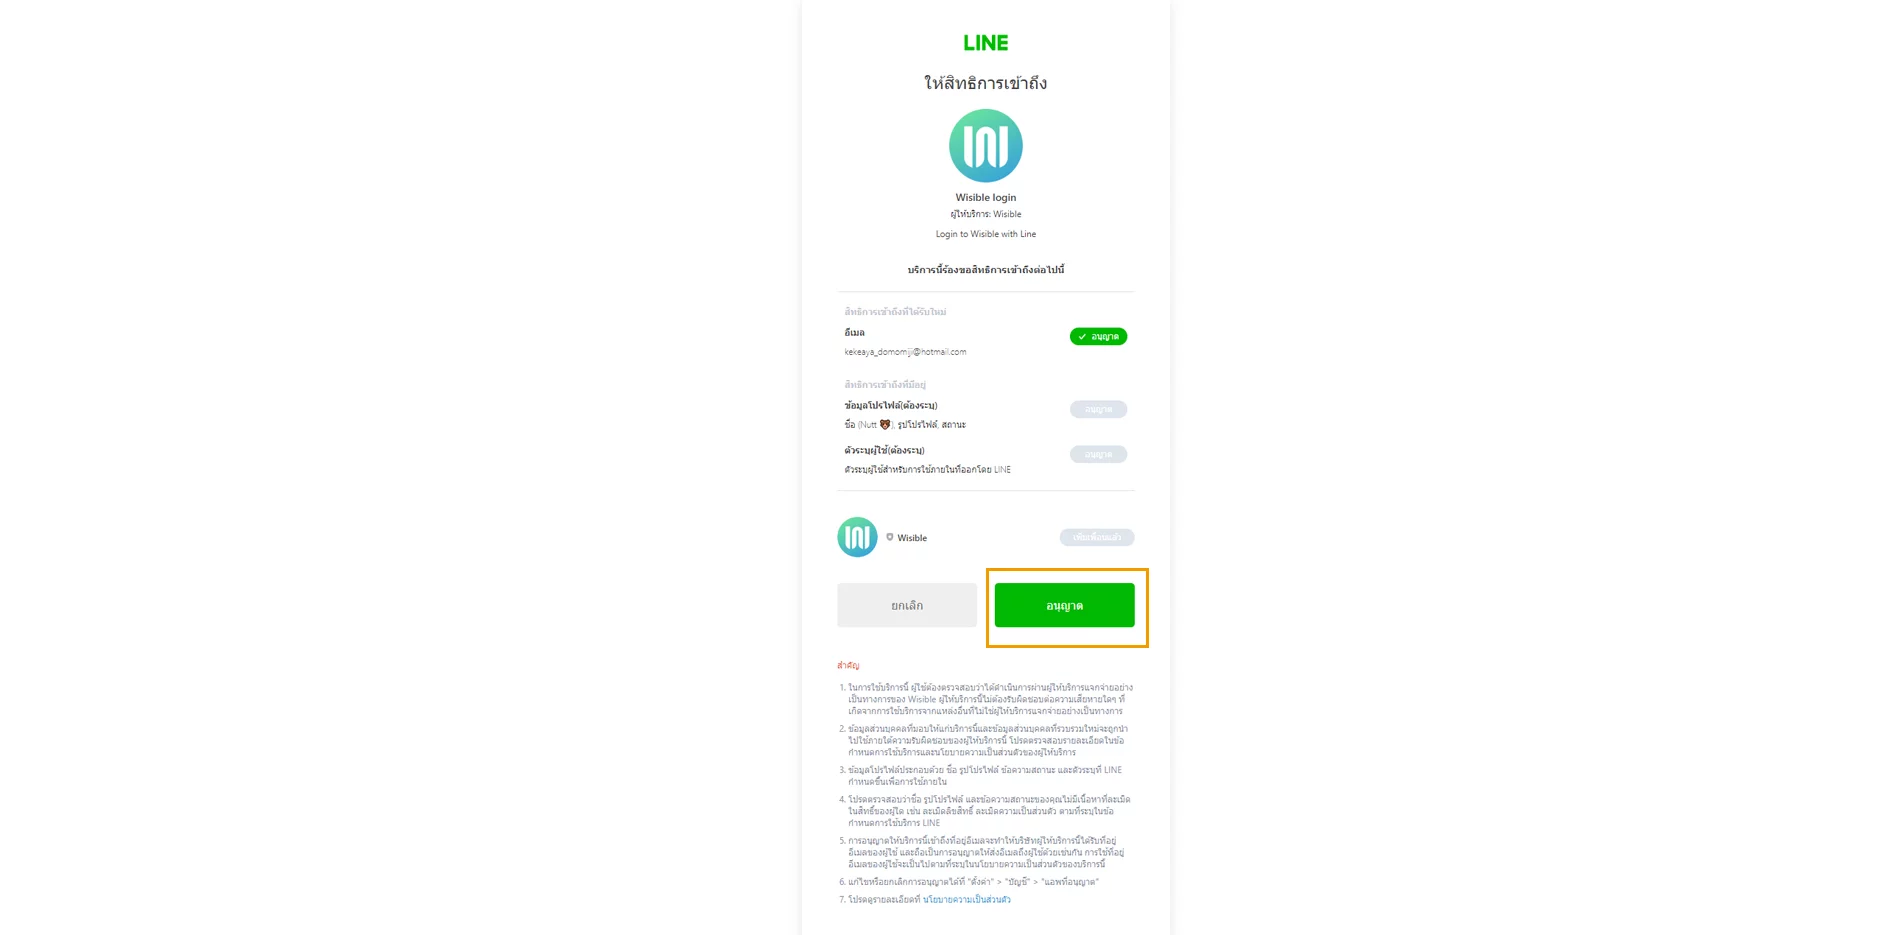
- Once verified, it will link to the page, allowing to access via Wisible, click ‘Allow’, then, it will link you to the fill in detail page like other registration methods. After filling the details, you will be able to use it immediately.
With all these steps, you will be able to access to Wisible’s Pipeline page, and you will be ready to start using Wisible.