How to invite your team to use Wisible

Riki Kimura wisible author

Riki Kimura

Digital Marketing Executive at Wisible

How to invite your team to use Wisible

For maximum efficiency in using Wisible with the team, you can simply invite your team to use Wisible within a few steps.

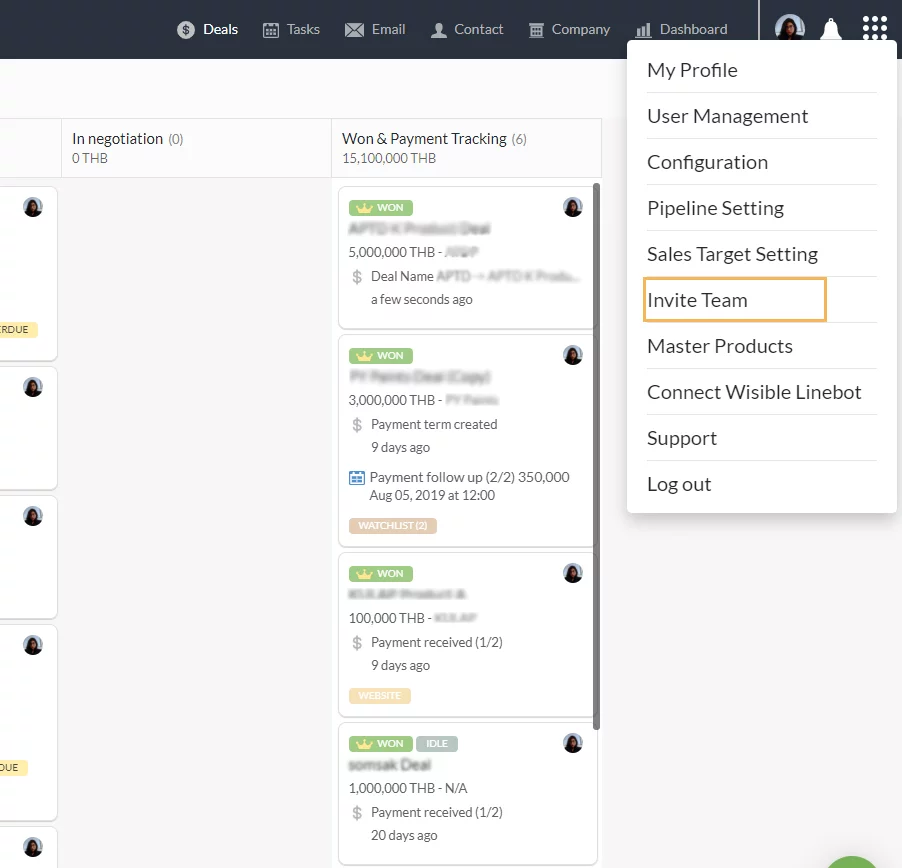
1. Enter to sub-menu ‘Invite Team’

Go to 9 dots menu on the top right corner on Wisible page, then choose ‘Invite Team’
2. Enter ‘Invite Team’ Page

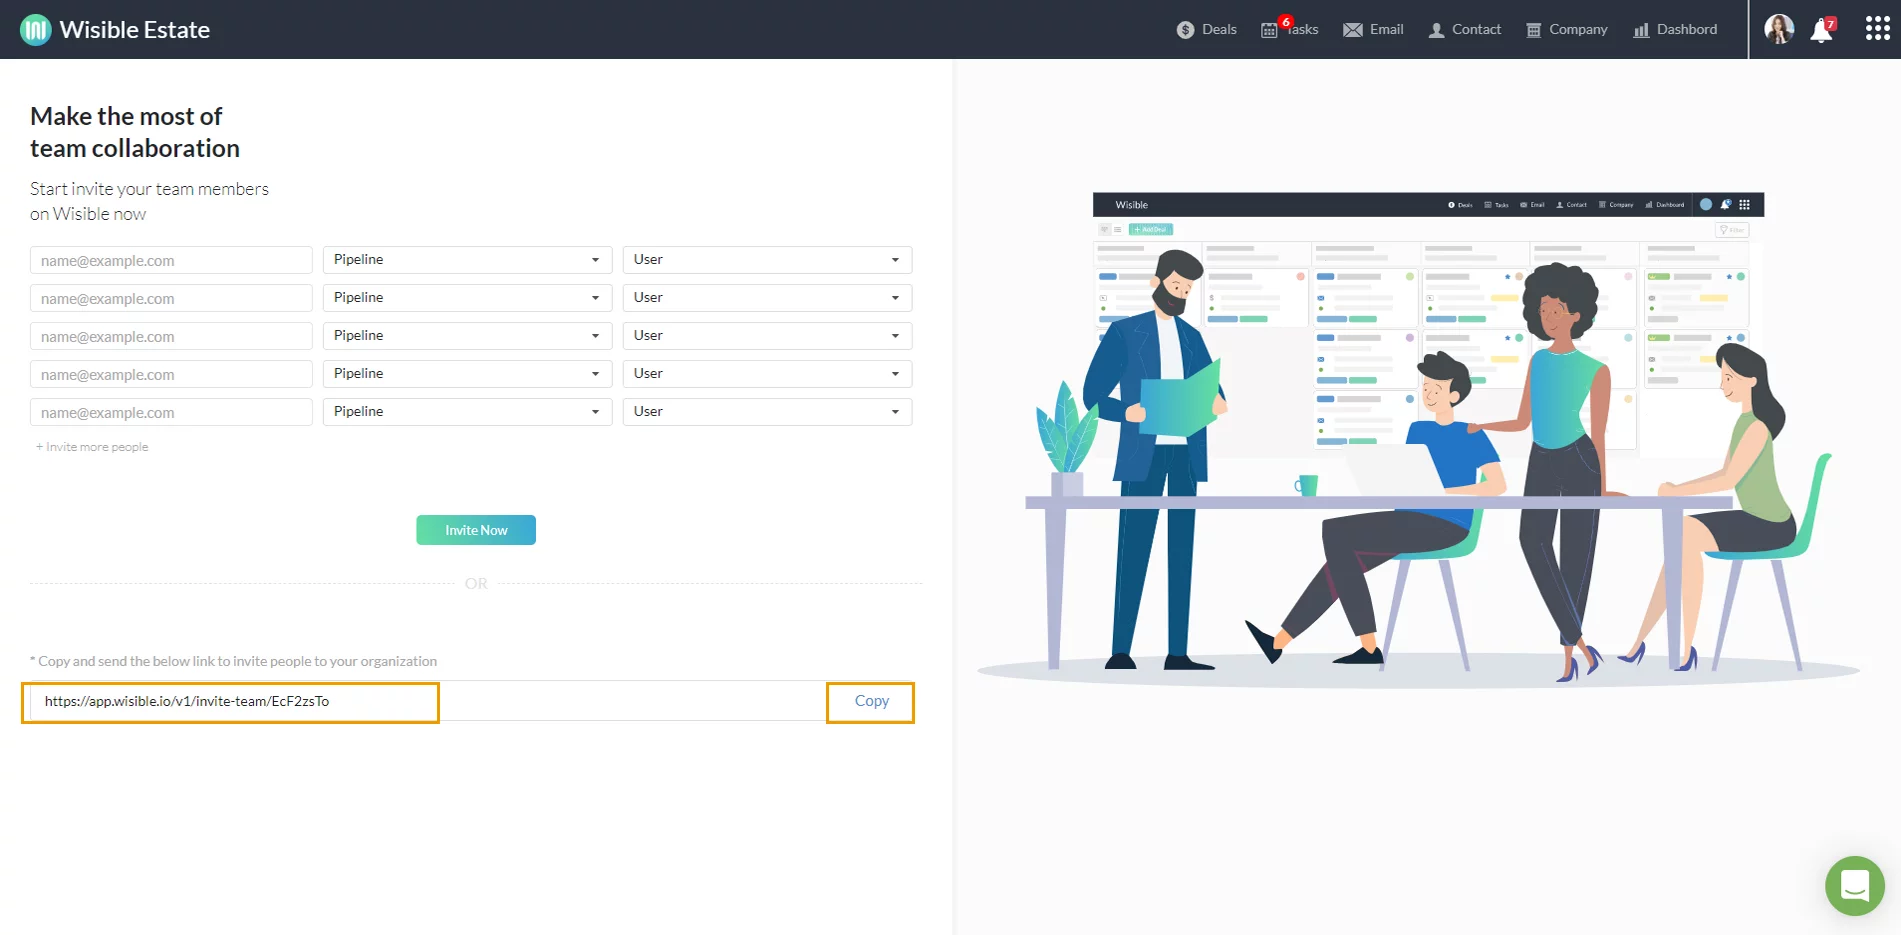
After clicking the ‘Invite Team’ button, you will be entered into the ‘Invite Team’ Page. You can choose to invite your team member via email or invitation link to each member.
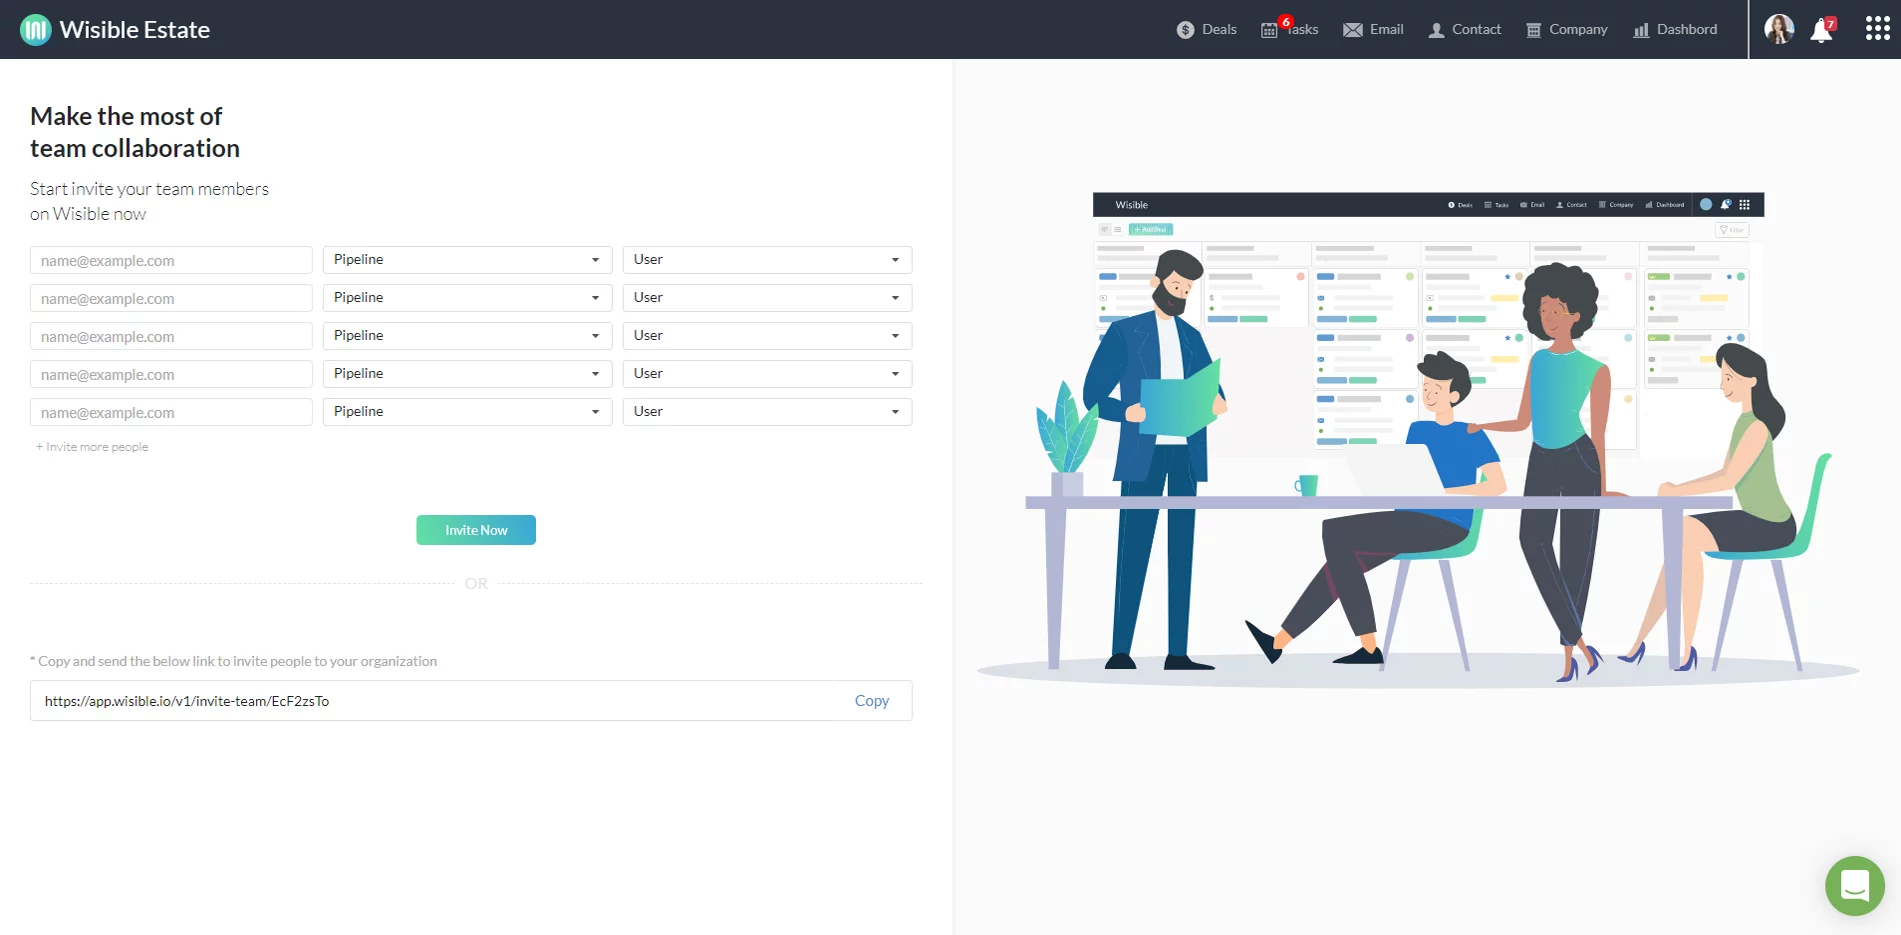
Super Admin can clink on the copy button below to copy the invitation link and send it to your team through any channel that is convenient for you.
4. Sending an Invitation with Email, Filling in Team Email and Manage the Right
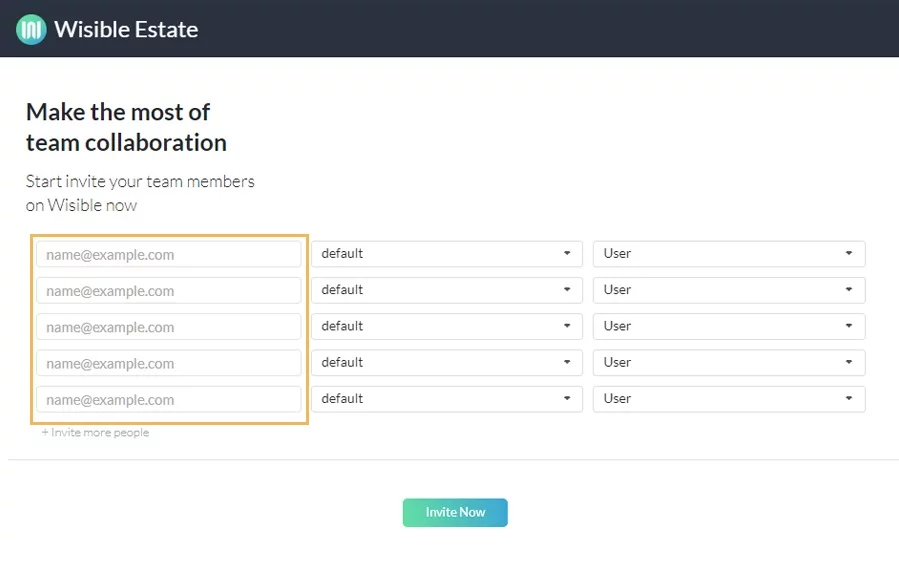
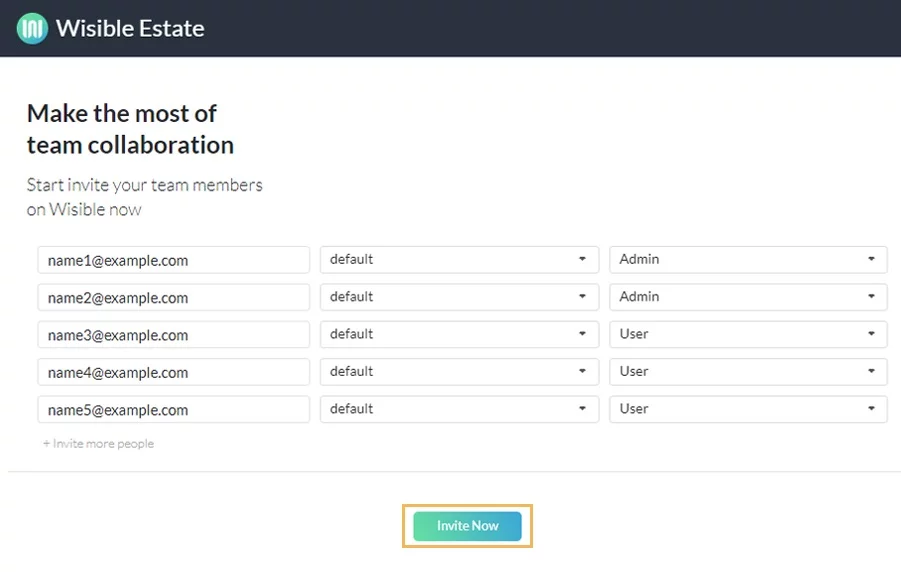
After clicking the ‘Invite Team’ button, you will be entered into the ‘Invite Team’ Page. Firstly, the left hand side of the page, please fill in your team’s email into each blank space. If there are more than 5 members in the team, you can click on ‘+Invite more people’ button to add more fill in space.

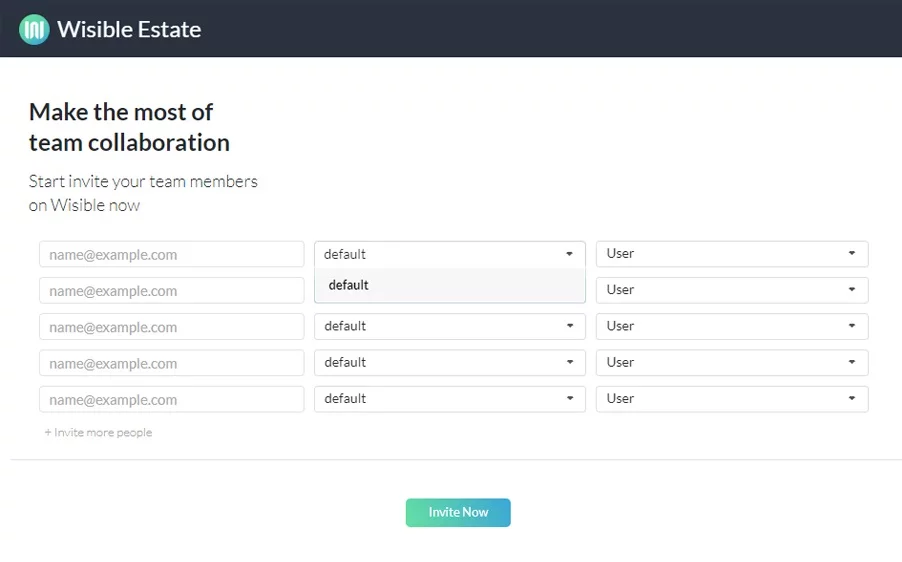
In case of having many boards, you can individually choose each of your team member to become a member of which board.
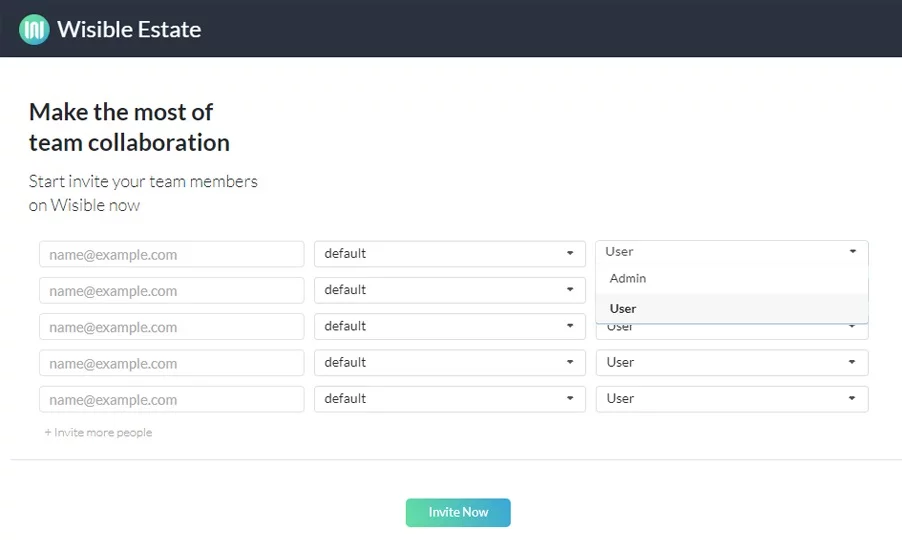
You can determine level of the user in particular board, whether to be a user or an admin level.
Once filling in all the details, click on the ‘Invite Now’ button, please do not forget to inform your team member to check the email’s inbox in order to accept the invitation to use Wisible as your team.

Similar Posts

  • เพิ่ม note ของคุณ ผ่าน Wisible Line assistant

    หลายครั้งที่คุณอยากจะจดบันทึกสั้นๆ เกี่ยวกับดีลงานทันทีที่คุยเสร็จ หรือที่คุณนึกออก ครั้นจะจดใส่ในกระดาษ บางทีคุณก็ลืมที่จะนำมาพิมพ์สรุปอีกครั้ง แน่นอนว่าเราเข้าใจความต้องการนี้ นอกจากที่คุณจะสร้างดีลใหม่ผ่าน Wisible Line assistant ได้แล้ว เรายังมีเมนูเพิ่มบันทึกให้คุณด้วย เพียงกดเลือกที่เมนู เพิ่มบันทึก (Add Note) และเลือกชื่อดีลทีคุณต้องการจะเพิ่มบันทึกเข้าไป โดยเราได้เรียงมาให้แล้ว คุณสามารถกดที่ Show next deal ได้หากยังไม่พบชื่อดีลที่ต้องการ เมื่อเลือกดีลแล้วคุณสามารถพิมพ์บันทึกข้อความของคุณลงไปได้เลยทันที แล้วกดส่ง เมื่อกดส่งบันทึกของคุณแล้ว จะได้รับข้อความแจ้งเตือนจากระบบ ว่าคุณได้เพิ่มบันทึกเรียบร้อยแล้ว พร้อมแจ้งว่าคุณได้บันทึกอะไรลงไปที่ดีลใด ไม่ต้องง้อการจดใส่กระดาษเเล้วรอไปเพิ่มใน Wisible ภายหลัง เพียงเเค่เชื่อมต่อกับ Wisible Line assistant เท่านี้คุณก็สามารถส่งบันทึกย่อเพื่อเเจ้งทีมงานของคุณได้ตลอดเเม้จะไม่อยู่หน้าคอมพิวเตอร์ก็ตาม สะดวกสุดๆเลยค่ะ 😀

  • How To Connect Hotmail, Outlook In Wisible With Two-Step Verification

    For anyone who is using email with Microsoft, you can connect to Wisible with Microsoft account as well which have 3 main steps as follows: 1. 2-Step Verification To increase safety level and protect from any surveillance that might try to use your email, you can turn on 2-step verification by following these steps; 2….

  • สร้างดีลใหม่อย่างรวดเร็วผ่าน Wisible assistant ใน Line

    หลังจากที่คุณ Connect Wisible Linebot เรียบร้อย คุณจะพบกับเมนู 6 เมนู ที่สามารถทำงานผ่าน Wisible Line assistant ได้มาเริ่มที่ลำดับแรก เมนูซ้ายสุดแถวบน สร้างดีลใหม่ (Add Deal) คุณสามารถสร้างดีลแบบเร่งด่วนผ่านเมนูดังกล่าวได้เพียงเเค่ตอบคำถามต่อไปนี้ให้ครบ คำถามที่สอง Deal is a company or a person กดเลือกว่าลูกค้าของคุณในดีลนี้เป็น บริษัท หรือบุคคลธรรมดา คำถามที่สาม Please enter the company name/ the person name พิมพ์ชื่อบริษัทหรือบุคคลที่เป็นลูกค้าในดีลนี้ของคุณ คำถามที่สี่ Please enter the deal value (number only) กรอกเฉพาะตัวเลขมูลค่าคาดคะเนของดีลนี้ลงไป หรือจะเลือกจากที่เราแนะนำก็ได้เช่นกัน คำถามที่ห้าเฉพาะ user ที่มีสิทธิ์เข้าถึง Pipeline มากกว่า 1…