สร้างดีลใหม่บน Wisible ได้ง่ายๆ ในไม่กี่ขั้นตอน
ขั้นตอนแรกสำหรับทุกท่านที่ต้องการใช้งาน Wisible ง่ายมากเพียงทำตามขั้นตอนดังต่อไปนี้ 1. LOGIN เข้าสู่ WISIBLE เพียงแค่คุณเข้ามายังหน้าแรกของ Wisible…
ขั้นตอนแรกสำหรับทุกท่านที่ต้องการใช้งาน Wisible ง่ายมากเพียงทำตามขั้นตอนดังต่อไปนี้
1. LOGIN เข้าสู่ WISIBLE
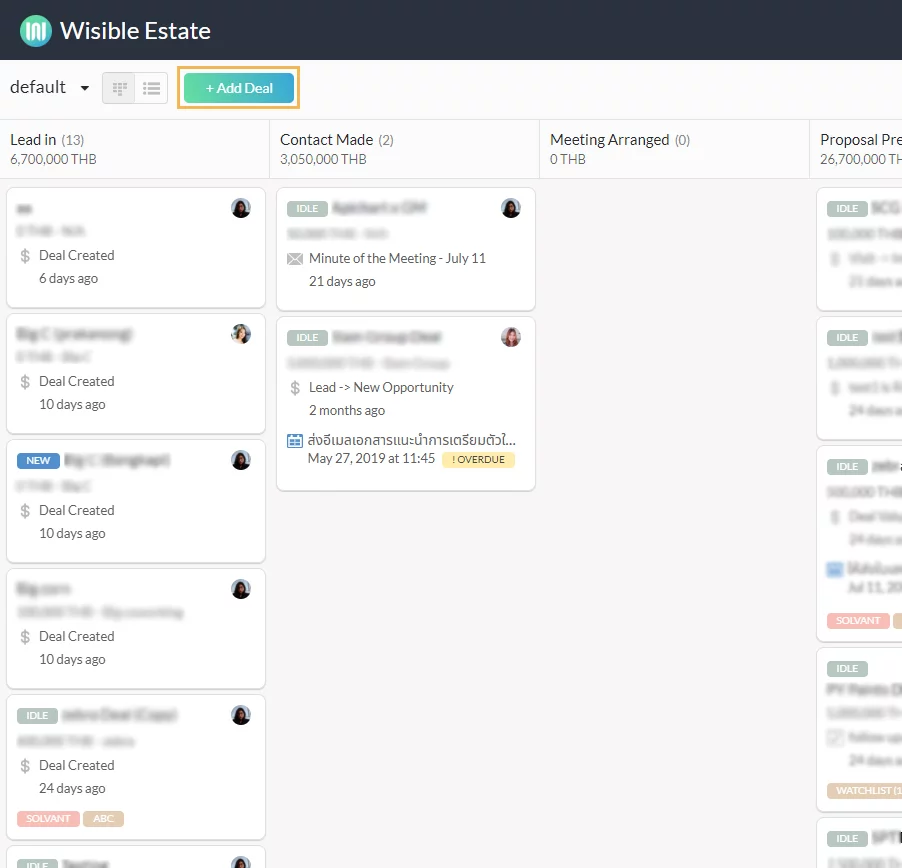
เพียงแค่คุณเข้ามายังหน้าแรกของ Wisible มองหาปุ่ม +Add Deal ที่มุมซ้ายบนใต้ชื่อบริษัทของคุณ
2. เริ่มต้นด้วยการสร้าง DEAL ใหม่ในระบบ
หลังจากกดปุ่ม +Add Deal จะปรากฏหน้า Add deal ขึ้นมาเพื่อให้กรอกข้อมูลสำคัญที่เราคัดเลือกมาไว้ในหน้าดังกล่าวให้แล้ว
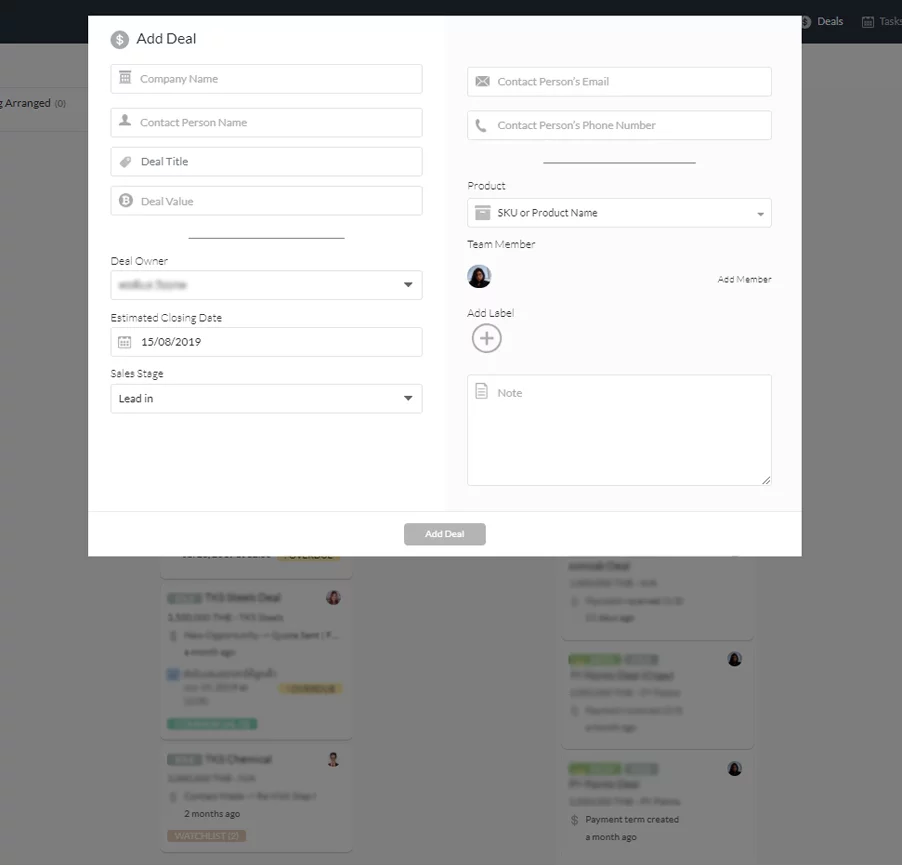
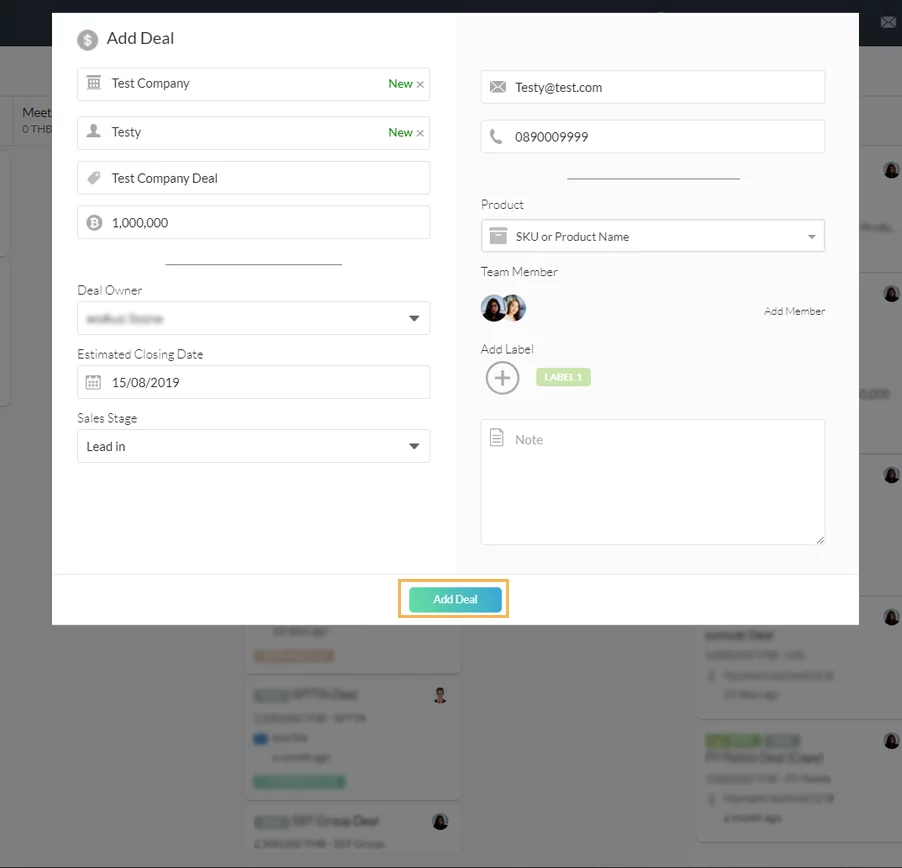
3. กรอกรายละเอียด
กรอกรายละเอียดดังต่อไปนี้
- กรอกชื่อบริษัท
- ชื่อผู้ติดต่อ (ชื่อบุคคล)
- อีเมล
- เบอร์โทร
- ชื่อ Deal (ระบบจะนำชื่อบริษัท หรือชื่อผู้ติดต่อและเติมคำว่า Deal เข้าไปเป็นค่าเริ่มต้น)
- มูลค่าของ Deal
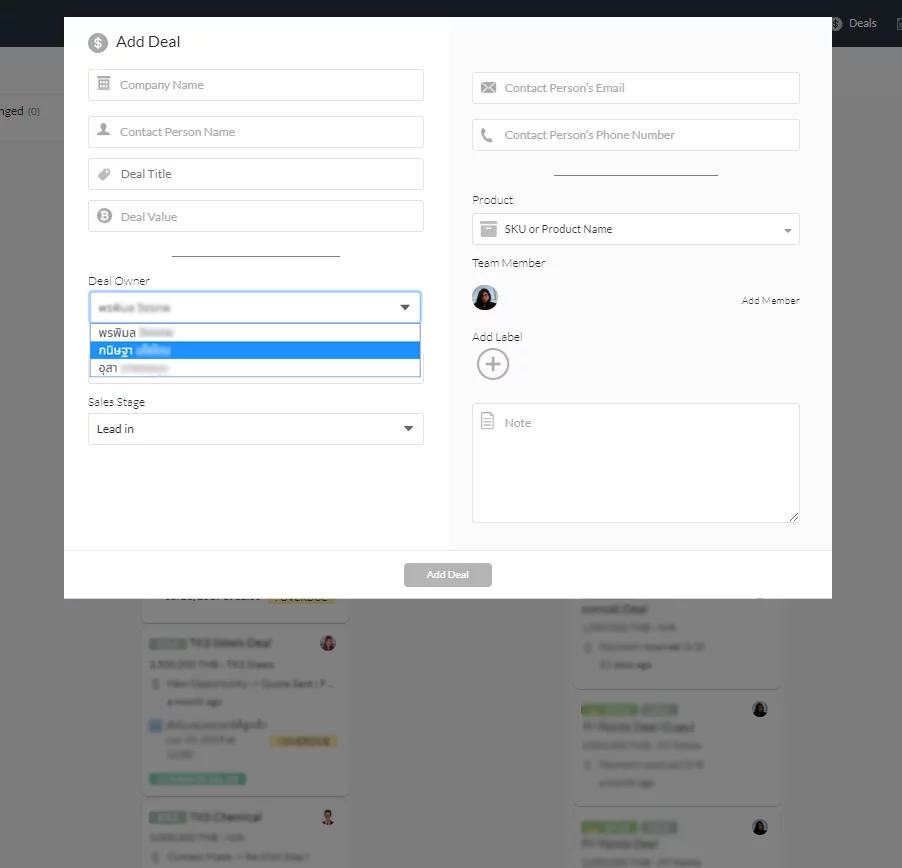
กรอกเรียบร้อยแล้ว สามารถมอบหมายให้คนในทีมเป็น Deal Owner แทนตัวเราเองได้
สามารถแก้ไข Estimated Closing Date ได้
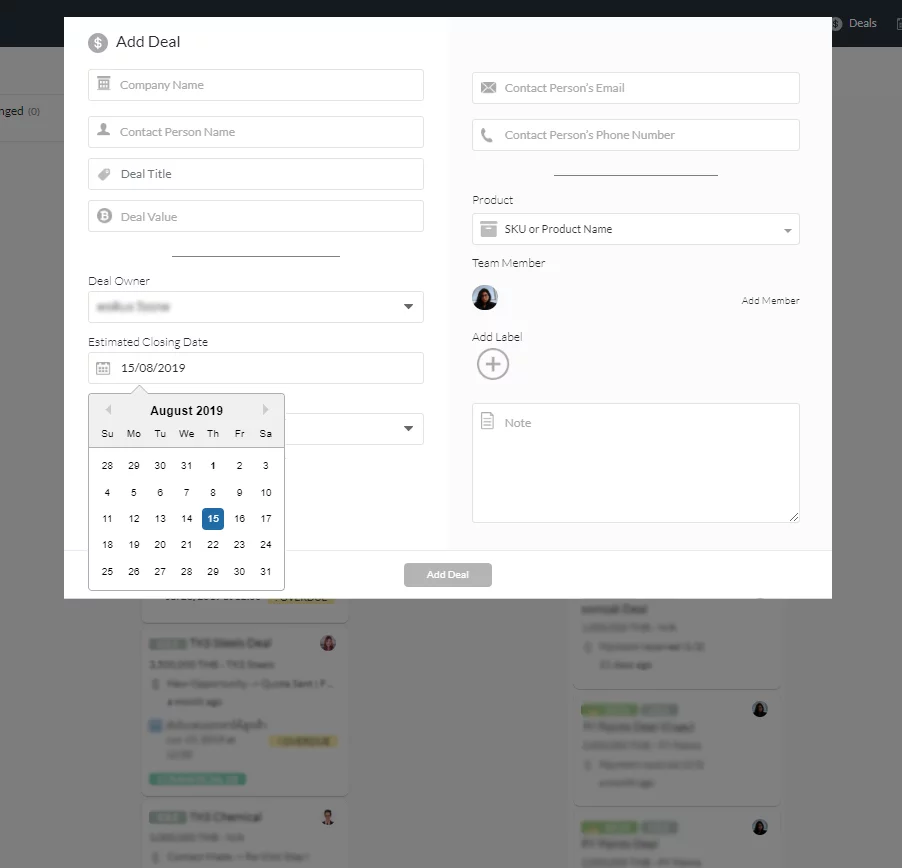
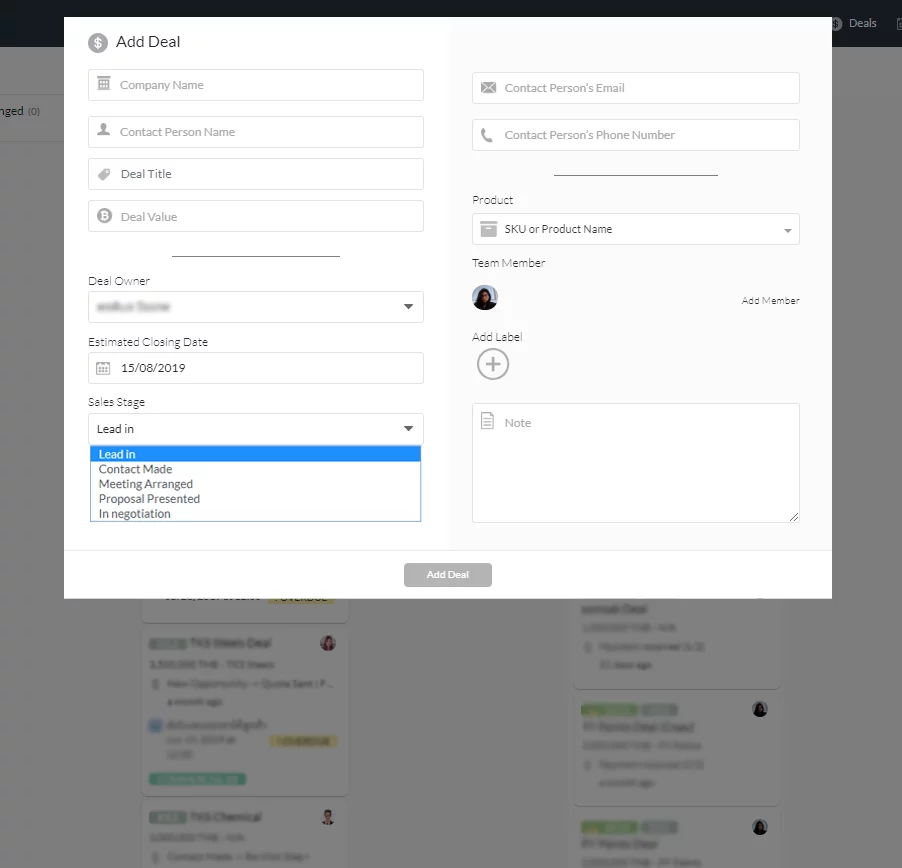
สามารถเลือก Sales Stages ได้ โดยค่าเริ่มต้นคือ Lead in (Lead ใหม่), Contact Made (ติดต่อลูกค้าแล้ว), Meeting Arranged (นัดหมายกับลูกค้าแล้ว), Proposal Presented (เสนอราคาให้ลูกค้าแล้ว), In Negotiation (อยู่ระหว่างเจรจาต่อรอง)โดยค่าเริ่มต้นจะเลือกเป็น Sales Stage แรกเสมอ
สามารถเลือก Product* ที่จะเสนอขายใน Deal นั้นได้ ด้วยการกดเข้าไปที่ Product แล้วพิมพ์ SKU หรือชื่อของ Product (ในครั้งแรกจะค้นหาไม่เจอ สามารถข้ามไปใส่ภายหลังสร้าง Deal เสร็จได้)
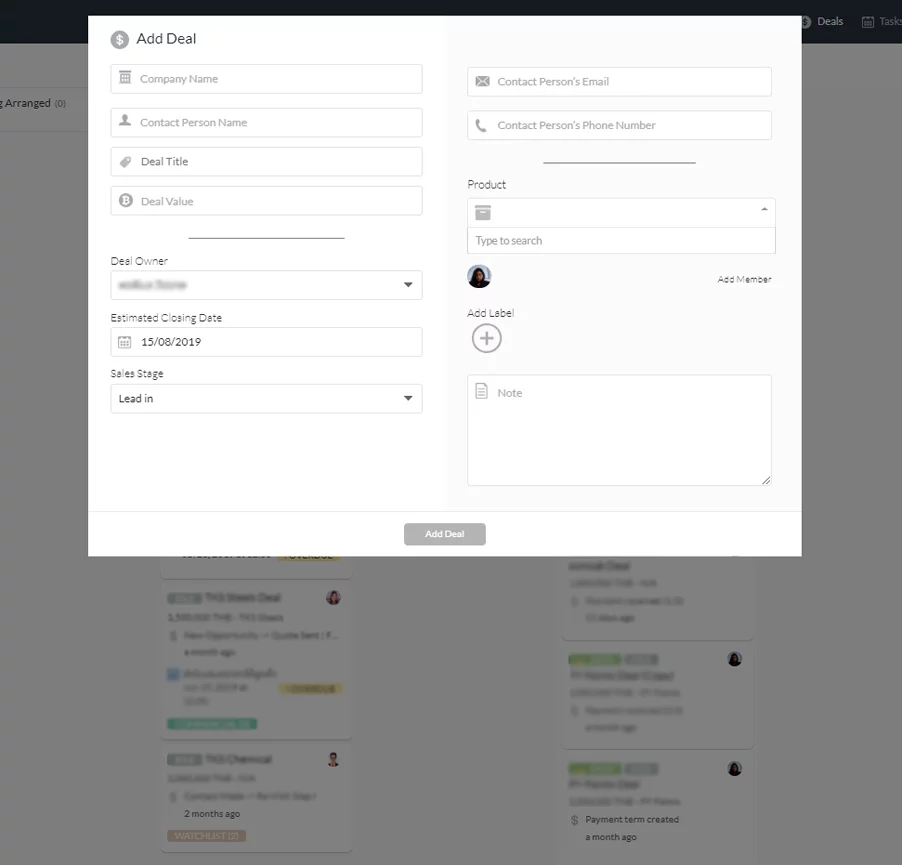
* Product Module เป็น Premium Feature สำหรับลูกค้าที่ใช้ Enterprise Package ที่ใช้ Product Extension เท่านั้น
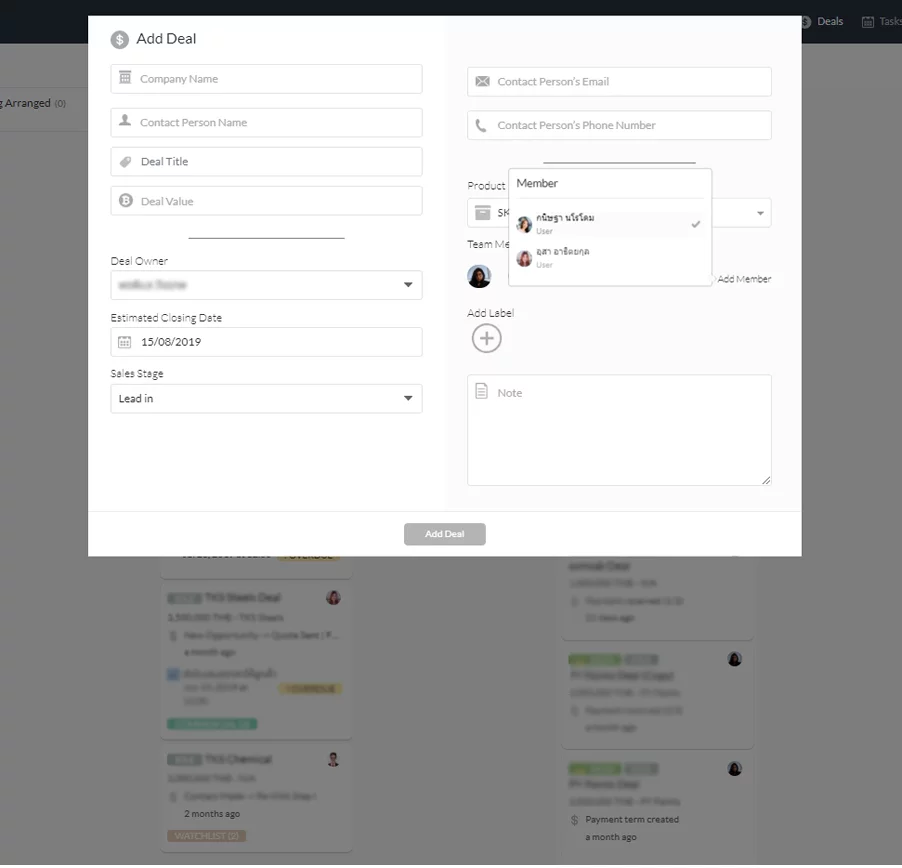
สามารถจัดการ Member ใน Deal นั้นได้ ด้วยการกดเข้าไปที่ Add Member สามารถเลือกคนที่ต้องการให้ทราบรายละเอียดของ deal นั้นได้ด้วยการเลือกเครื่องหมายถูกข้างหลังชื่อ
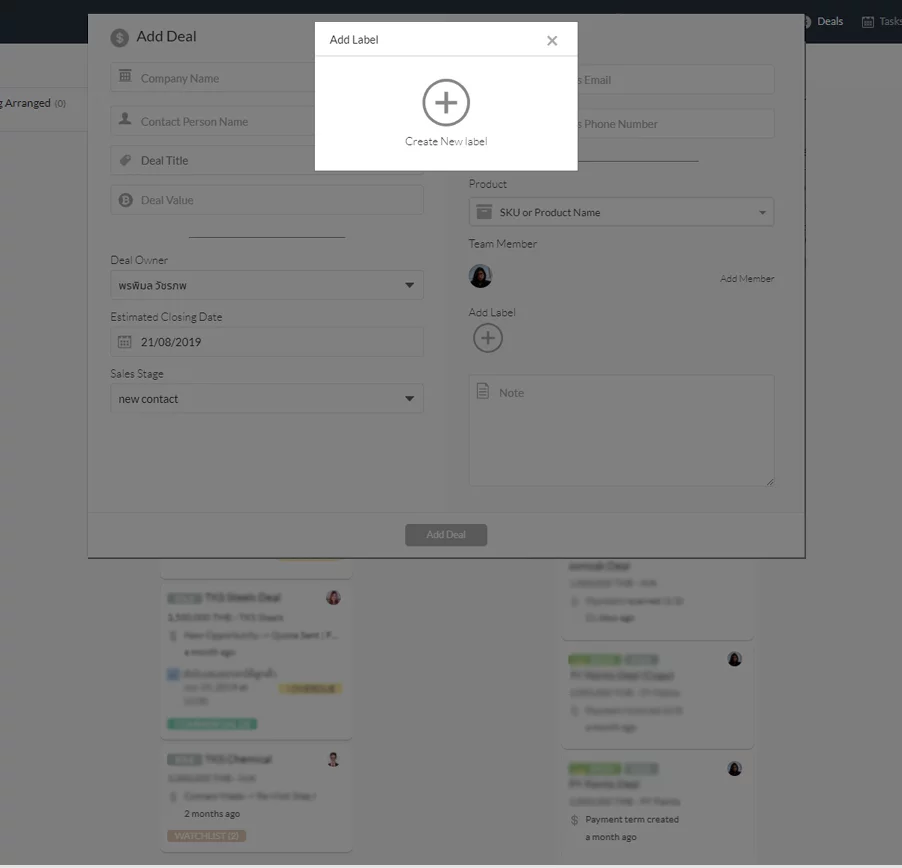
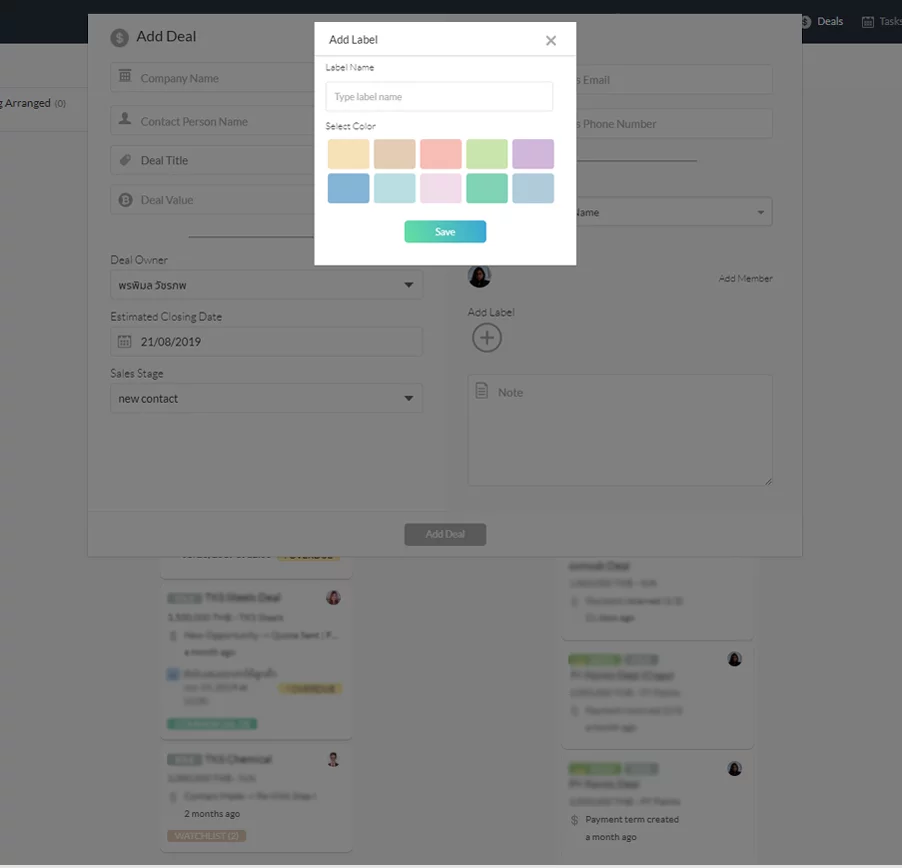
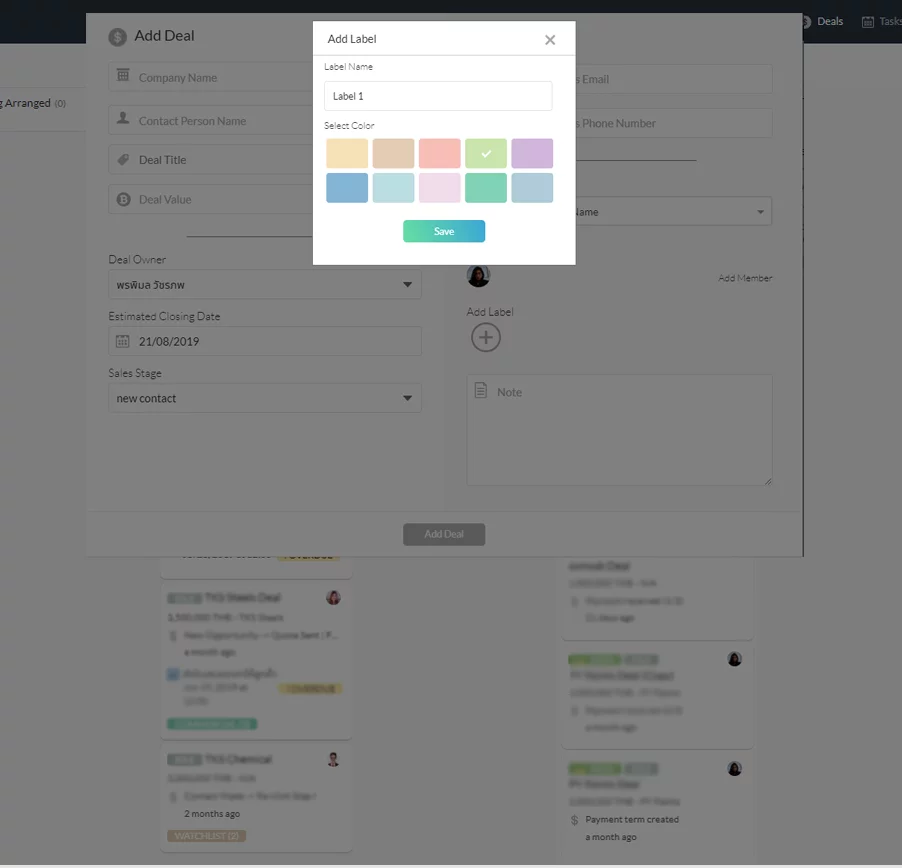
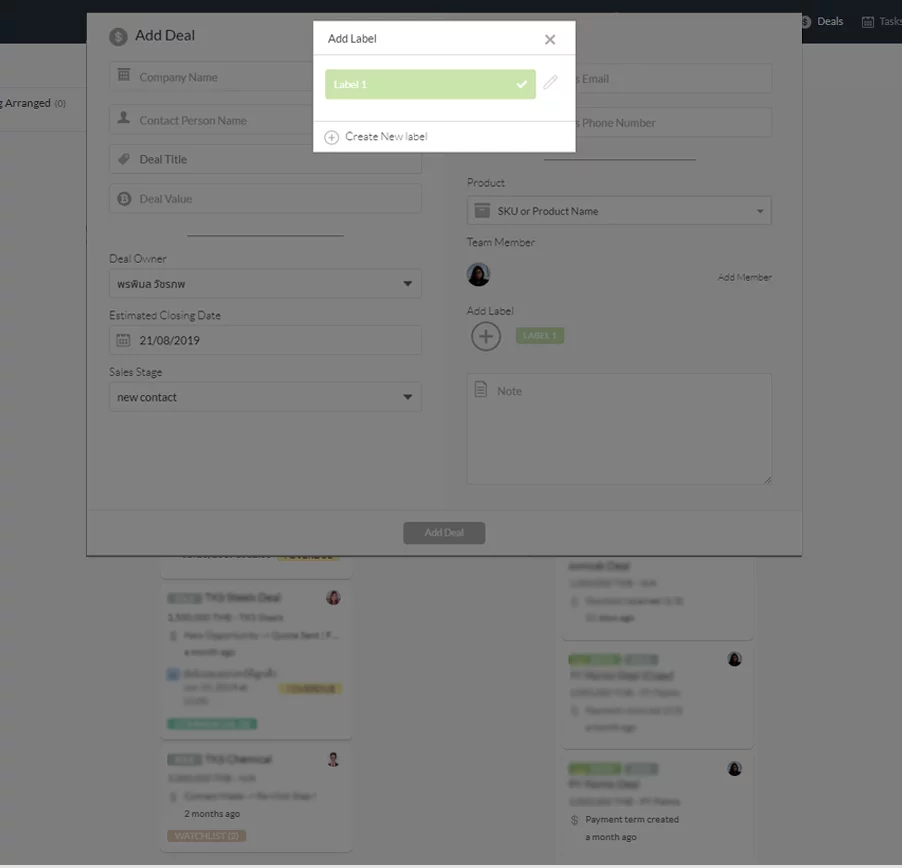
สามารถสร้างและใส่ Label เพื่อจัดกลุ่มให้กับ deal ของคุณ จัดการ Member ใน Deal ด้วยการกดไปที่สัญลักษณ์รูป + กลางวงกลมใต้หัวข้อ Add Label
ขั้นตอนสุดท้ายเมื่อจัดการข้อมูลเรียบร้อยแล้วให้กดที่ปุ่ม Add deal จะได้ Deal Card ขึ้นมาใหม่หนึ่งอัน ยินดีด้วย คุณได้สร้าง Deal แรกของคุณเสร็จเรียบร้อยแล้ว 🙂